Validate a custom form in Magento 2

This article will cover the fundamentals of validating any form in Magento 2.
The contact form on Contact us page will be used and modified for the purpose of the article. The form itself can be found in the following paths, depending on the type of installation you are using:
app/code/Magento/Contact/view/frontend/templates/form.phtmlvendor/magento/module-contact/view/frontend/templates/form.phtml
In order to demonstrate how to get the forms to be validated, let’s create a validation-free form with some fields. Copy the file from one of the paths above and paste it into your theme:
app/code/VENDOR/THEME/Magento_Contact/frontend/templates/form.phtml
Next, paste the following code inside of it:
<form class="form contact-inchoo" action="<?php /* @escapeNotVerified */ echo $block->getFormAction(); ?>" id="contact-form" method="post" data-hasrequired="* Required Fields">
	<fieldset class="fieldset">
		<div class="field name required">
			<label class="label" for="field1"><span>Field 1 (using data-validate)</span></label>
			<div class="control">
                		<input name="field1" id="field1" title="Field 1" value="" class="input-text" type="text" />
			</div>
		</div>
	        <div class="field name required">
			<label class="label" for="field2"><span>Field 2 (using attribute)</span></label>
			<div class="control">
                		<input name="field2" id="field2" title="Field 2" value="" class="input-text" type="text" />
			</div>
		</div>
        	<div class="field name required">
            		<label class="label" for="field3"><span>Field 3 (using classname)</span></label>
            		<div class="control">
                		<input name="field3" id="field3" title="Field 2" value="" type="text" class="input-text" />
            		</div>
        	</div>
        	<div class="field name required">
            		<label class="label" for="field4"><span>Field 4 (using data-mage-init)</span></label>
            		<div class="control">
                		<input name="field4" id="field4" title="Field 4" value="" class="input-text" type="text" />
            		</div>
        	</div>
	        <?php echo $block->getChildHtml('form.additional.info'); ?>
	</fieldset>
	<div class="actions-toolbar">
	        <div class="primary">
            		<input type="hidden" name="hideit" id="hideit" value="" />
            		<button type="submit" title="Submit" class="action submit primary">
                		<span>Submit</span>
            		</button>
        	</div>
    	</div>
</form>
Your form should look like this one:
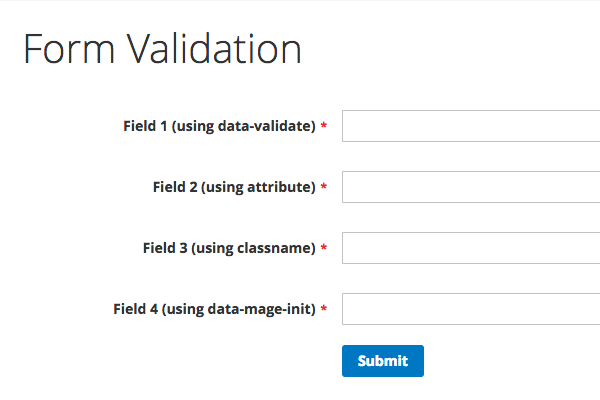
If you click the “Submit” button, the form would be submitted.
Step 1: add the validation component
Add this attribute on the form tag:
data-mage-init='{"validation":{}}'
This one data attribute tells Magento that the form must be validated before submit and that validation alias should invoke some particular file using RequireJS. If you take a look at the page source of the compiled file RequireJS config file (found in pub/static/frontend/VENDOR/THEME/LOCALE/requirejs-config.json), you should be able to find the following snippet:
var config = {
	map: {
		"*": {
			...
			"validation": "mage/validation/validation",
			...
		}
	}
	...
};
The string on the right of the validation alias matches the lib/web/mage/validation/validation.js file that will load entire validation logic and take care of your input fields.
Step 2: add some validation rules to your input fields
By looking at the code of validation logic, Magento made it possible to set validation rule names by using one of the following methods listed here:
- method #1 – by setting
data-validateattribute on the input field:<input data-validate='{"required":true}'name="field1" id="field1" ... /> - method #2 – by setting the rule names as attributes:
<input required="true" name="field2" id="field2" ... /> - method #3 – by setting the rule names as classnames:
<input class="input-text required" name="field3" id="field3" ... /> - method #4 – by setting the rules inside of the data-mage-init attribute on the form tag
<form ... data-mage-init='{
	"validation":{
		"rules": {
			"field4": {
				"required":true
			}
		}
	}
}'>
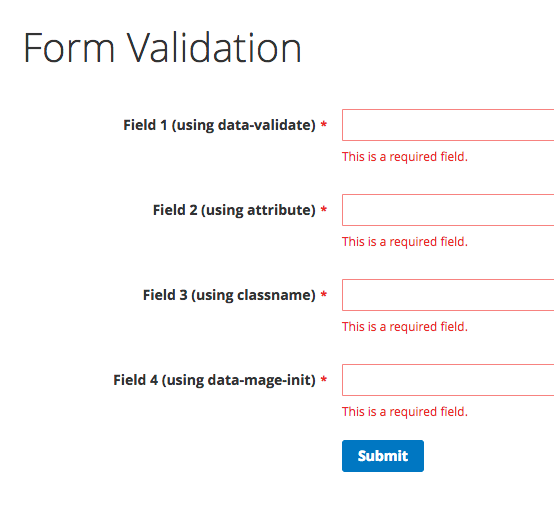
Now when you submit your form, all of the fields should be invalid, like on the image:
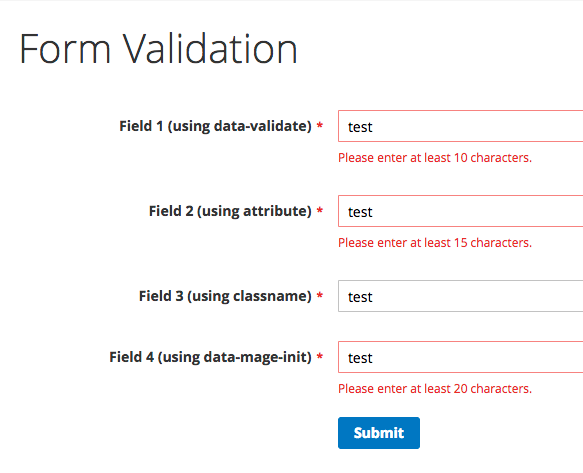
Rules with arguments
If you have to use a rule that requires a parameter (for example, minlength, maxlength and many other) you can use one of the following three methods, which ever you prefer:
- method #1
data-validate='{ "required":true, "minlength":10 }' - method #2
required="true" minlength="15" - method #4 – you have to manually specify name attribute of each input field which rules are applied (which is already taken care of if you use it inline with data-validate attribute)
data-mage-init='{
	"validation":{
		"rules": {
			"field4": {
				"required":true,
				"minlength":20
			}
		}
	}
}'
List of form validation rules
To wrap up this article, a list of validation rule names is provided here as a quick reference toward the official documentation:
- jQuery rules:
- required,
- remote,
- email,
- url,
- date,
- dateISO,
- number,
- digits,
- creditcard,
- equalTo,
- maxlength,
- minlength,
- rangelength,
- range,
- max,
- min
- Magento rules:
- max-words
- min-words
- range-words
- letters-with-basic-punc
- alphanumeric
- letters-only
- no-whitespace
- zip-range
- integer
- vinUS
- dateITA
- dateNL
- time
- time12h
- phoneUS
- phoneUK
- mobileUK
- stripped-min-length
- email2
- url2
- credit-card-types
- ipv4
- ipv6
- pattern
- allow-container-className
- validate-no-html-tags
- validate-select
- validate-no-empty
- validate-alphanum-with-spaces
- validate-data
- validate-street
- validate-phoneStrict
- validate-phoneLax
- validate-fax
- validate-email
- validate-emailSender
- validate-password
- validate-admin-password
- validate-customer-password
- validate-url
- validate-clean-url
- validate-xml-identifier
- validate-ssn
- validate-zip-us
- validate-date-au
- validate-currency-dollar
- validate-not-negative-number
- validate-zero-or-greater
- validate-greater-than-zero
- validate-css-length
- validate-number
- required-number
- validate-number-range
- validate-digits
- validate-digits-range
- validate-range
- validate-alpha
- validate-code
- validate-alphanum
- validate-date
- validate-date-range
- validate-cpassword
- validate-identifier
- validate-zip-international
- validate-one-required
- validate-state
- required-file
- validate-ajax-error
- validate-optional-datetime
- validate-required-datetime
- validate-one-required-by-name
- less-than-equals-to
- greater-than-equals-to
- validate-emails
- validate-cc-type-select
- validate-cc-number
- validate-cc-type
- validate-cc-exp
- validate-cc-cvn
- validate-cc-ukss
- validate-length
- required-entry
- not-negative-amount
- validate-per-page-value-list
- validate-per-page-value
- validate-new-password
- required-if-not-specified
- required-if-all-sku-empty-and-file-not-loaded
- required-if-specified
- required-number-if-specified
- datetime-validation
- required-text-swatch-entry
- required-visual-swatch-entry
- required-dropdown-attribute-entry
- Validate-item-quantity
- validate-grouped-qty
- validate-one-checkbox-required-by-name
- validate-date-between
- validate-dob
Congratulations, you have reached the end of this article! If you have any questions, feel free to post a comment below.
Related Inchoo Services


16 comments
I do understand that this article has focus on frontend validation, but form_key needs to be part of html form, like so
1-
app/code/Magento/Contact/view/frontend/templates/form.phtml
2-
vendor/magento/module-contact/view/frontend/templates/form.phtml
I do not find all the components of this direction so must I create them ?
Hello,
I want to apply pattern validation so how can I check to validate?
i tried `data-msg-pattern=”Invalid firstname”` but nothing happned.
Please Help me.
What if the part of the form that needs to be required is a Select? Pretty much no info out there on select drop downs.
Not helpful article.
Hi Danijel,
The form only validate when we hit submit. Can we customize as user type in input field?
how to trigger/fire validation on blur of checkout page
I strongly recomend using form_key in custom forms! I do understand that this article has focus on frontend validation, but form_key needs to be part of html form, like so:
For custom modules – form_key validation in server side (controller) is achieved using method validate of object \Magento\Framework\Data\Form\FormKey\Validator. Build-in controllers checks form_key on default.
Or getBlockHtml(‘formkey’) ?>
Wouldn’t all the validation have to be repeated on the server side / PHP?
How to validate phone number minimum 10 digit and maxmimum 10 digit , please let me know ..
10
10
0
I’m struggling to find any example of regex
patternrule and how to pass it as css class on admin field form.Did you find anything? I struggle with that validator too
Hello ,
Is there any way to add custom validation message for each input in magento 2 ?
you can add messages following the same structure as on rules:
“validation”:{
“rules”: {
“field4”: {
“required”:true,
“minlength”:20
}
},
“messages”: {
“field4”: {
“required”: “error message 1”,
“minlength”: “error message 2”
}
}
}