Adding a new tab under one page checkout – full working module

Adding a new tab under one page checkout – full working module

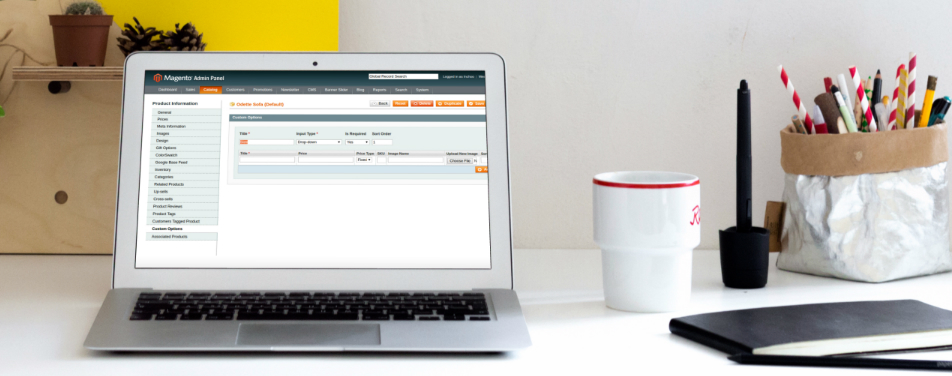
Adding a new tab under onepage checkout in Magento might seem as incredibly easy task. right?! Well, it’s not. If you want to do it properly, you gonna have to do some work. Took me few hours to get this one running. Attached are screenshots for you to see final result.

Frontend

Backend1

Here is the module itself Inchoo_Heared4us.

Few words about module. It uses built in Admin theme module from a coworker Ivan Weiler. If you have this Admin theme module installer already please disable it, since its built into this Heared4us module. There is only one thing you NEED TO DO in order for module to work: Once you added it to Magento, go to System > COnfiguration > Design and write down “custom” under Admin theme section. This admin theme section will appear as soon as you refresh Admin page once you copy-pasted module. If you get “Access denie” error, please logout and login into the admin.

That’s it. If you wish to edit the questions that appear under newely added tab, open the app/design/frontend/default/default/template/checkout/onepage/heared4us.phtml file and modify the array at the very top of the file.

DO A FULL DATABASE AND FILE BACKUP BEFORE ADDING A MODULE TO LIVE STORE.
You should always do a full backup when adding modules to live store. Although the module does not have any database dependencies and stuff, it uses overrides on checkout model, controller and block. Use on your own responsibility.

What you can learn from module? -You can learn how to override (extend) default controllers, Models, Blocks. You can learn how to modify existing JS files and reuse them (reused sample of JS for tab, saved it under heared4us.phtml file itself), you can learn how to set custom theme files on admin to avoid modifying default admin theme, learn how to extend order object (or any other, from sql setup file), learn how to “attach a hook” aka observer to event… Lot to learn on a small module like this. Hope it helps.

Cheers.

You made it all the way down here so you must have enjoyed this post! You may also like:

Meet Magento Belarus features an Inchooer talking Magento 2 Checkout Ivona Namjesnik
Ivona Namjesnik, | 0

Meet Magento Belarus features an Inchooer talking Magento 2 Checkout

Tracking Onepage Checkout abandonment using Google Analytics Drazen Karacic-Soljic
Drazen Karacic-Soljic, | 70

Tracking Onepage Checkout abandonment using Google Analytics

CheckItOut, alternative checkout for Magento Branko Ajzele
Branko Ajzele, | 27

CheckItOut, alternative checkout for Magento

168 comments

  1. I want to show this tab before login tab. it means this tab should be first tab in my checkout page. please let me know asap.

  2. Hi
    I have used Inchoo_Heared4us module for my magento 1.14 website
    I am in the process of converting website to magento 2.0.
    Are you gone a release this Inchoo_Heared4us module for magento 2?

    Thanks

  3. Hi,
    I need the custom tab to display next to “Shipping Information”.So, I had moved the step. But it works only after the “Payment Information”. Is there any idea to change the position of Tab.
    Looking for a positive response.

    Thank you.

  4. Hi,

    I’m using this module on magento 1.9 and it is not saving the value in db. I found the code


    $_inchoo_Heared4us = $this->getRequest()->getPost('getvoice');
    Mage::getSingleton('core/session')->setInchooHeared4us($_inchoo_Heared4us);

    in function,

    public function saveHeared4usAction()

    It seems that you have just saved it in session and not in database.
    Can you please guide me how can I save it in db?

    Thanks in advance.

    Best Regards,

    Deepak

  5. My value is not stored in the database. I am using Magento 1.9
    Need support. Please reply soon. Looking for a positive response

Leave a Reply

Your email address will not be published. Required fields are marked *

You may use these HTML tags and attributes: <a href="" title=""> <blockquote cite=""> <code> <del datetime=""> <em> <s> <strike> <strong>. You may use following syntax for source code: <pre><code>$current = "Inchoo";</code></pre>.

Tell us about your project

Drop us a line. We'd love to know more about your project.