 Welcome to the Magento 1 blog area, dedicated to all the developers who are still using this platform. If you find yourself here, it’s essential to take action now for the future of your business.
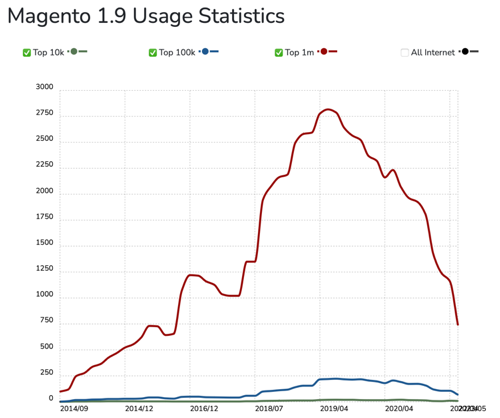
As of June 30, 2020, Magento versions 1.x are no longer officially supported. Yet, we understand that many websites are still running unsupported versions, particularly 1.9.x or lower. It’s crucial to be aware that this poses a significant security risk, making your website non-compliant with PCI standards and unsuitable for accepting online payments.
Your business deserves a secure and up-to-date platform. We strongly recommend migrating to a new and improved solution. If your business falls within the upper side of SMB size, Magento 2 is an excellent choice for your upgrade journey.
If you are searching for Magento 2 articles, please visit Magento 2 Category.

 solve it?")


