Today I will show you how to create custom data component in Pimcore 4.4.. If you are using Pimcore, sooner or later you will end up with requirement for new form element (complex type). Data components in Pimcore are object types used for complex data modeling on object. Data component consists from data, tag Extjs scripts and one Model which is responsible for saving/loading configuration. Currently Pimcore has 19 complex data components (you can read more on https://www.pimcore.org/docs/latest/Objects/Object_Classes/Data_Types/index.html), and they will cover most requirements you will ever need. However, if (when) you’ll need a custom data component, here’s how you can create it.
Custom component
For demonstration we’ll create custom data component which will use source from custom controller and show data as select field (dropdown). Also we’ll cover how to add custom options in data script and use it on tag script. First, we’ll create plugin skeleton with basic plugin data in plugins folder and our folder will be called “Customdatacomponent”. If you want to know how to create plugin please read article “Extending Pimcore with plugins” on our blog. After we have created plugin skeleton it’s time to work on the component configuration script.
Data script
Data script is required for component configuration, and without this script our custom component will not be displayed in Pimcore. Let’s create script on location [Pimcore root]/plugins/Customdatacomponent/static/js/data-components/data/customcomponent.js, and include script in plugin configuration (plugin.xml):
<pluginJsPaths>
	<path>/plugins/Customdatacomponent/static/js/data-components/data/customcomponent.js</path>
</pluginJsPaths>
and we can write some code after that. First, we need to register pimcore.object.classes.data.customdatacomponent namespace and add new component class in pimcore.object.classes.data which will create class from pimcore.object.classes.data.data. To make it all work we also need to set type, allowed in, initialize logic, type name, icon class and group. We also need to work on getLayout method where we’ll add one custom option. But first, let’s write complete data script:
/**
* Custom data component - configuration
*/
pimcore.registerNS("pimcore.object.classes.data.customdatacomponent");
pimcore.object.classes.data.customdatacomponent = Class.create(pimcore.object.classes.data.data, {
type: "customdatacomponent",
/**
* define where this datatype is allowed
*/
allowIn: {
object: true,
objectbrick: false,
fieldcollection: false,
localizedfield: false,
classificationstore : false,
block: true
},
initialize: function (treeNode, initData) {
this.type = "customdatacomponent";
this.initData(initData);
this.treeNode = treeNode;
},
getTypeName: function () {
return 'Custom data component';
},
getIconClass: function () {
return "pimcore_icon_select";
},
getGroup: function () {
return "select";
},
getLayout: function ($super) {
$super();
this.specificPanel.removeAll();
this.specificPanel.add([
{
xtype: "textfield",
fieldLabel: 'Custom option',
name: "customoption",
value: this.datax.customoption
}
]);
return this.layout;
},
applyData: function ($super) {
$super();
delete this.datax.options;
},
applySpecialData: function(source) {
if (source.datax) {
if (!this.datax) {
this.datax = {};
}
}
}
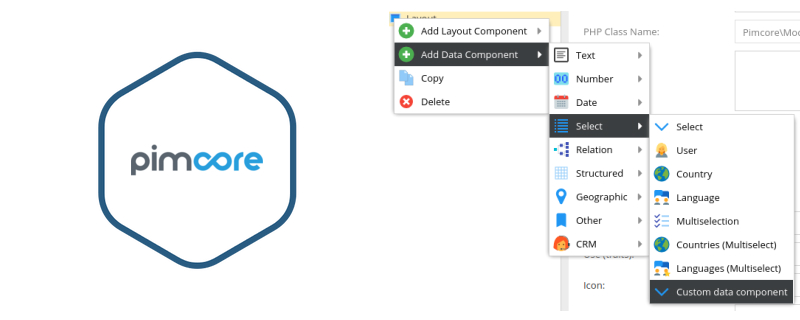
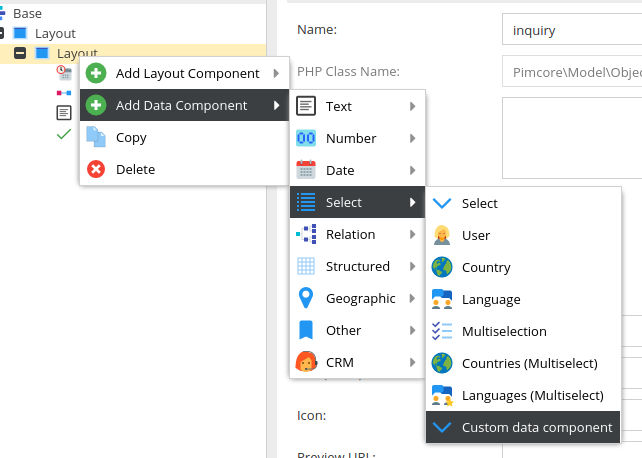
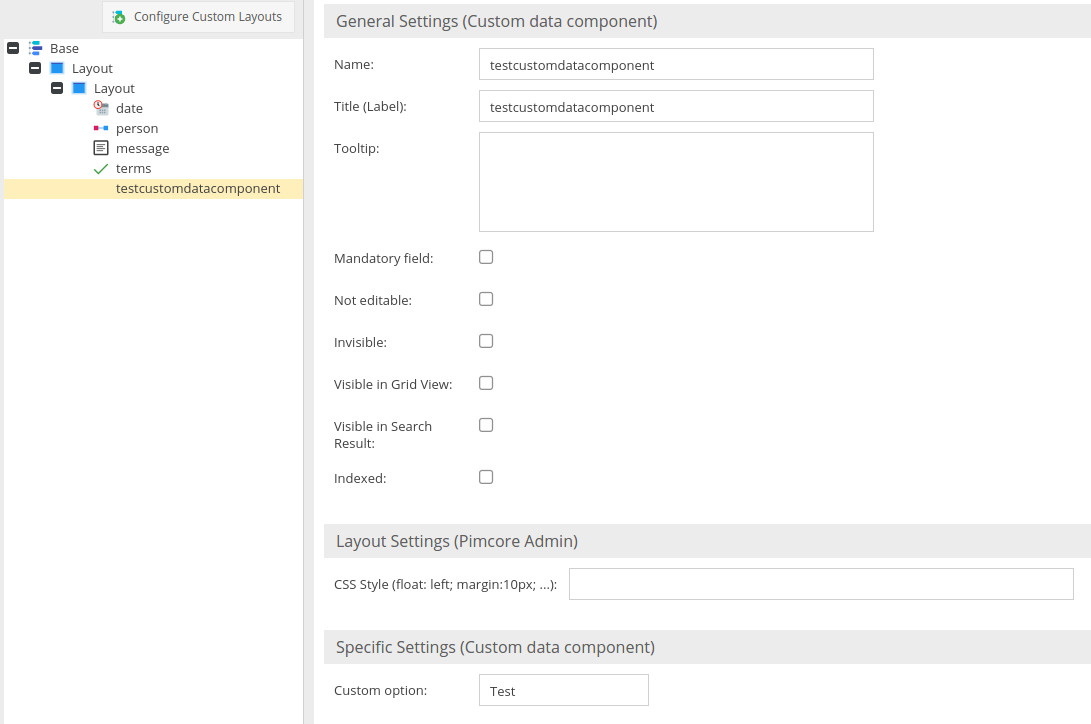
});You can see we have added Custom option (text field) in get layout method. We’ll call that value in tag script for label value. For demonstration we have set data component to be available only on objects (allowIn array). This is how it should look on data components menu:
and this is how it should look on configuration form:
Model
To save and load data into component configuration we’ll need to create corresponding model. When you click on save button in class form, our custom data component Pimcore will lookup for model in PimcoreModelObjectClassDefinitionData namespace, file with Customdatacomponent name and class Customdatacomponent which extends ModelObjectClassDefinitionDataSelect. Now we need to create model on path [Pimcore root]/plugins/Customdatacomponent/lib/Pimcore/Model/Object/ClassDefinition/Data/Customdatacomponent.php. As you can see, starting point for autoloader in our plugin is in lib folder. Here is the model logic:
<?php
namespace PimcoreModelObjectClassDefinitionData;

use PimcoreModel;

class Customdatacomponent extends ModelObjectClassDefinitionDataSelect
{

    /**
     * Static type of this element
     *
     * @var string
     */
    public $fieldtype = "customdatacomponent";

    public $customoption;

    /** Restrict selection to comma-separated list of countries.
     * @var null
     */
    public $restrictTo = null;

    public function __construct()
    {
    }

    public function setcustomoption($customoption)
    {
        $this->customoption = $customoption;
    }

    public function getcustomoption()
    {
        return $this->customoption;
    }
}
We have extended ModelObjectClassDefinitionDataSelect class because our custom data component is also select type and we already have all the logic. For custom option we’ll create class variable “customoption”, and the name matches as option added in data component. We also need setter and getter methods (setcustomoption and getcustomoption). Now we can test save and load configuration for our component on class form.
Tag script
We’ll create tag script which will be used to render data component. First, we’ll create the whole script logic and then I will explain every part. For this example we’ll cover getLayoutEdit method which is used by edit form. Create data script on location [Pimcore]/plugins/Customdatacomponent/static/js/data-components/tags/customcomponent.js
/**
*
*/
pimcore.registerNS("pimcore.object.tags.customdatacomponent");
pimcore.object.tags.customdatacomponent = Class.create(pimcore.object.tags.select, {
type: "customdatacomponent",
initialize: function (data, fieldConfig) {
this.data = data;
this.fieldConfig = fieldConfig;
},
getLayoutEdit: function ($super) {
$super();
this.storeoptions = {
autoDestroy: true,
proxy: {
type: 'ajax',
url: "/plugin/Customdatacomponent/index/values",
reader: {
type: 'json',
rootProperty: 'id'
}
},
fields: ["id", "value", "text"],
listeners: {
load: function() {
}.bind(this)
}
};
this.store = new Ext.data.Store(this.storeoptions);
var options = {
name: this.fieldConfig.title,
triggerAction: "all",
editable: true,
typeAhead: true,
forceSelection: true,
selectOnFocus: true,
fieldLabel: this.fieldConfig.customoption,
store: this.store,
componentCls: "object_field",
width: 250,
style: "margin: 10px",
labelWidth: 100,
valueField: "value"
};
if (this.fieldConfig.width) {
options.width = this.fieldConfig.width;
} else {
options.width = 300;
}
options.width += options.labelWidth;
if (this.fieldConfig.height) {
options.height = this.fieldConfig.height;
}
if (typeof this.data == "string" || typeof this.data == "number") {
options.value = this.data;
}
this.component = new Ext.form.ComboBox(options);
this.store.load();
return this.component;
}
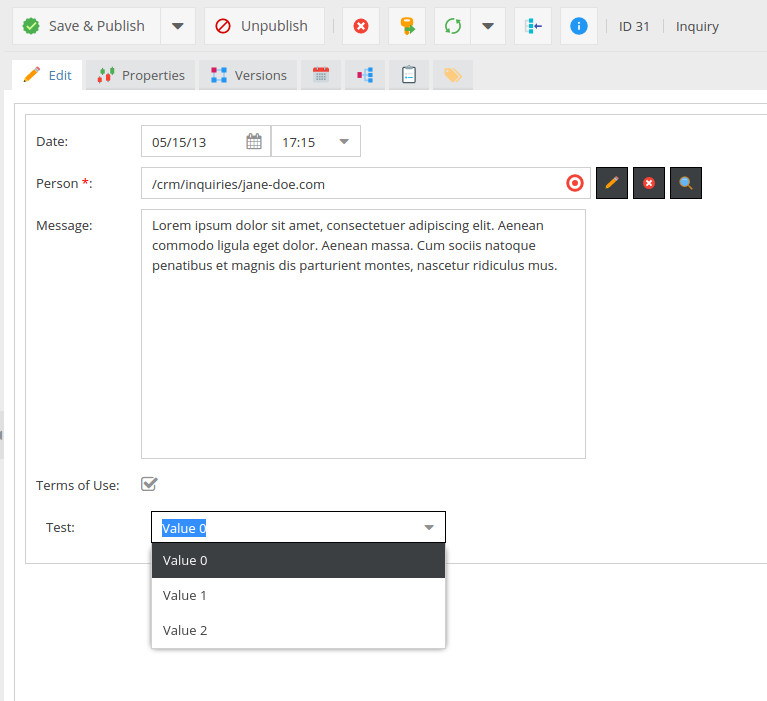
});After we set type and initialize class, we have created getLayoutEdit logic. First, we need to create storeoptions which are used to create store that will store pulled data from the custom controller. Data will be formatted to populate options for dropdown. For options we need to set proxy to point on url “/plugin/Customdatacomponent/index/values” and enable auto destroy and fields which will be returned by controller per item. After we create store options we’ll instantiate Ext.data.Store class. Next thing is to create options for component. Most of them are generic, but it’s important to set name (from configuration object), field label and store (instantiated store). Notice that we have set fieldLabel to value of our customoption from configuration to demonstrate how to use custom option field from data script on tag script. After options we need to create Ext.form.ComboBox, load store and return instantiated component. This is how our component looks like in object form:
Controller
Only thing we are missing to have data for tag script is custom controller. We’ll create custom controller on location [Pimcore root]/plugins/Customdatacomponent/controllers/IndexController.php
<?php

class Customdatacomponent_IndexController extends PimcoreControllerActionAdmin
{
    public function indexAction()
    {

        // reachable via http://your.domain/plugin/Customdatacomponent/index/index
    }

    public function valuesAction()
    {

        $response = array(
            array(
                'id' => 0,
                'value' => 0,
                'text' => 'Value 0'
            ),
            array(
                'id' => 1,
                'value' => 1,
                'text' => 'Value 1'
            ),
            array(
                'id' => 2,
                'value' => 2,
                'text' => 'Value 2'
            )
        );

        return $this->_helper->json($response);
    }
}
Our logic is in valuesAction method. As you can see, we have prepared sample array with fields defined in store configuration in tag script. Important thing is to return array as json, for that we’ll use json method from our helper. Note that we are extending PimcoreControllerActionAdmin class because it may contain sensitive data, so only admin should be able to access it.
Conclusion and Github
Now you have a basic knowledge on how to extend data components in Pimcore and you can additionaly improve our plugin to cover, for example, grid logic for select field. Hope this will help you to understand data components and Pimcore itself. Thanks for reading, soon we’ll cover more topics for extending Pimcore.
You can find our example plugin on https://github.com/zoransalamun/pimcore-custom-data-component
However, if you’re having trouble with Magento or Pimcore or need our technical assistance, feel free to drop us a note – we’ll be glad to check out your code and help you with development or review your site and help you get rid of any bugs there.