So, you’ve finally managed to create your new theme in Magento 2. After a few hours of swearing and sweating, you’ve successfully created all necessary files, defined fallback to Luma (you can blame Luma for all the mess that will happen later on), registered your theme within the system, activated it in the Magento Administration…aaaand…you are ready to go!
But, what now?
We’ve all been reading about the new changes that will happen in Magento 2 frontend.
Everyone was talking about speed, new technologies that we’ll be able to see in new edition.
Platform was in development phase, things were changing from release to release…and, of course, no one was really thinking about first questions that start to show up after you really start to work on your first Magento 2 project.
Soon I realized that, regardless of what I already know about all the new stuff and how to work with them, I was really absolutely clueless on how to begin with work, how to set up and organize everything properly.
Yes, we had official documentation but for me it was confusing and some things weren’t clearly explained.
In this article, I will show you everything I did during my work on the first Magento 2 project.
There may be better solutions than mine and I hope you will write them down in comments!
I presume you know about CLI commands for Magento 2. We will use some of them to work with static files and compiling.
If you don’t know which one to use and when, here’s the list of all commands with description.
I created new theme in new Vendor package, fallback was set to Luma theme.
I was using default tools for work :
- Grunt as task runner
- LESS as pre-processor
- Livereload to inject changes in browser.
LESS structure
Structure is totally different than in Magento 1, LESS files can be found on multiple places.
Theme-related LESS files are located in :
/Magento2/app/design/frontend/Magento/luma/web/css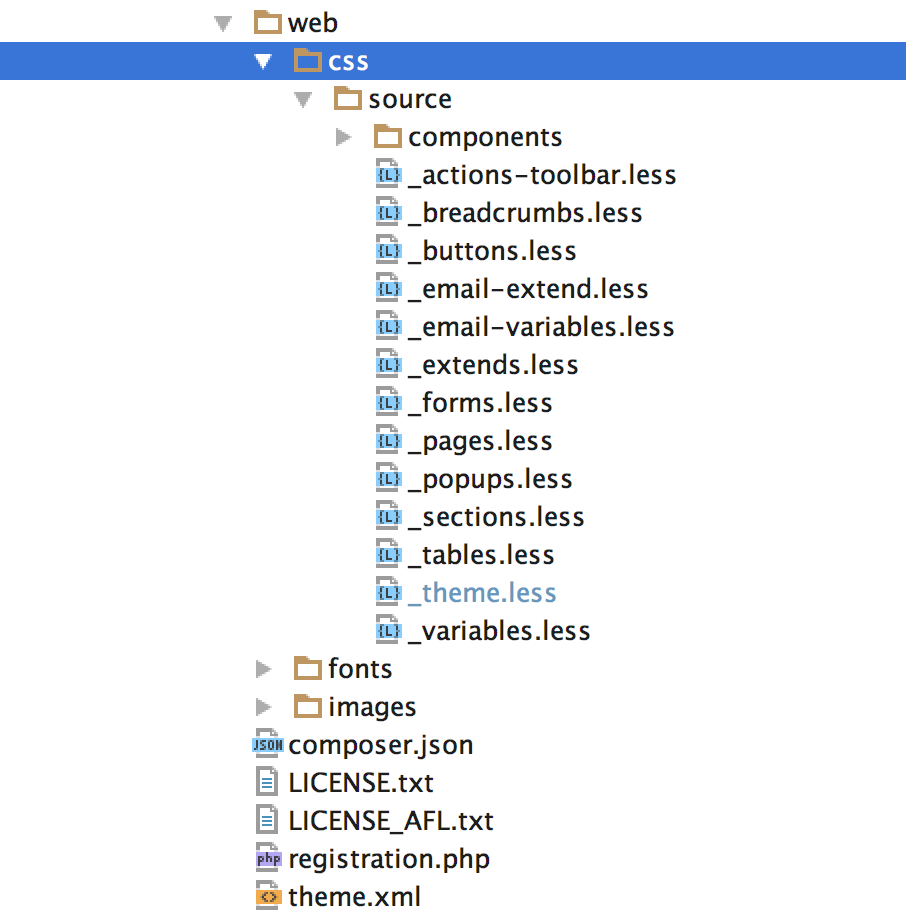
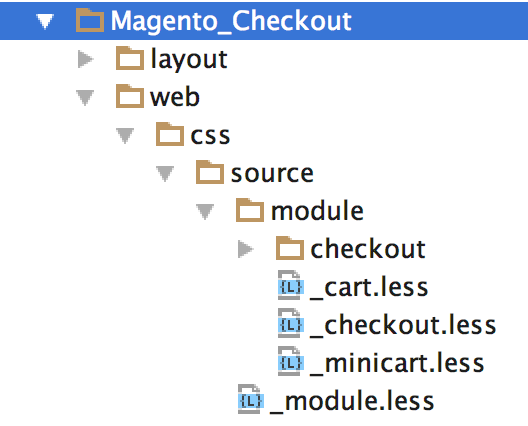
Module-specific LESS files can be found in modules folder. For example, you can find LESS files for the Checkout module (including cart,minicart etc.) here :
/Magento2/app/design/frontend/Magento/blank/Magento_Checkout/web/cssAs you can see, LESS files for Magento checkout module are stored inside “Blank” theme, not “Luma”.
If you don’t see LESS files in module folders inside “Luma” theme, you know that they can be found in “Blank” theme.
Like we will override/extend some “Luma” LESS files for our newly created theme, “Luma” does the same to “Blank” theme – it inherits some of the styles and overrides others.
Magento 2 comes with UI library that was built to help Front end developers deal with common tasks. It employs a set of mixins for base elements to ease Front end theme development and customization.
UI library can be found here:
/Magento2/lib/web/css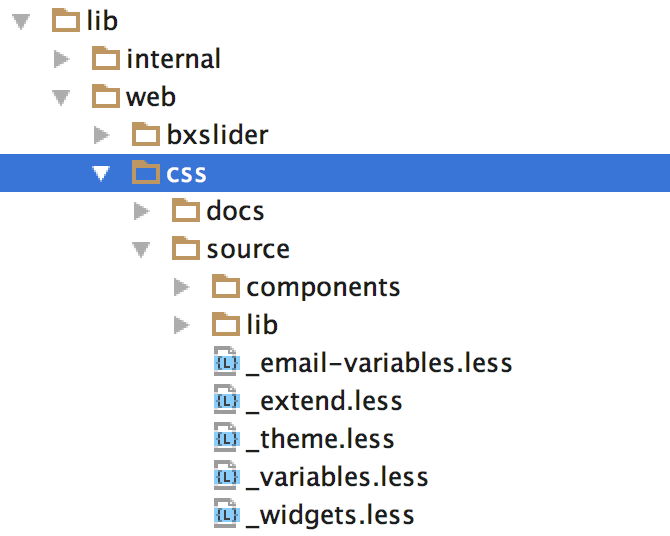
So, we have theme-related LESS files, module-related LESS files and LESS UI library.
After we are familiar with the structure, it is time to start with the real work.
First thing first – we need to deploy static files that will be served to the client.
Static files are to be found in this folder:
/Magento2/pub/staticWe can deploy static files by triggering
grunt exec:<YourThemeName>in console.
This command will generate static files for your theme and also, symlinks to corresponding LESS files.
Symlinks are basically symbolic links to your actual LESS files that are placed inside your theme (or fallback theme).
So , when you edit LESS file in your theme, changes will be automatically applied to the symlinked file stored in pub/static folder.
If you don’t get why is that so important, think about cleaning and deploying your static files after every change in LESS files.
Symlinks are also good for tracing and debugging.
If your LESS files icon has small arrow that points to top right, you know that file is symlinked.
Hovering over symlinked file will reveal real location of file that is stored in your theme (or fallback theme, or “lib” folder :)).
Extending Theme-related LESS files
OK, we have successfully deployed static files which are symlinked. That means we are ready for styling!
If you are happy with how most of the “Luma” theme looks like and would like to extend styling with your own css, the easiest way to achieve that is to create _extend.less file which will be placed here:
/Magento2/app/design/frontend/<Vendor>/<yourTheme>/web/css/source/_extend.less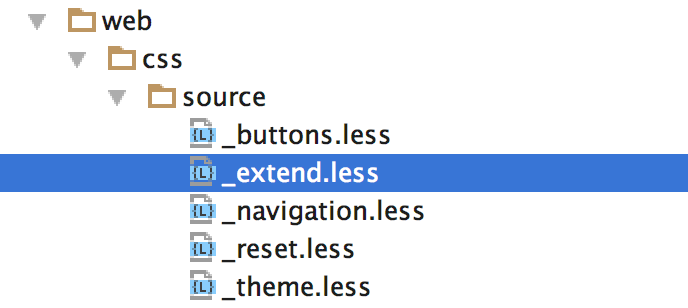
After adding new LESS files, you must deploy static content again.
First, in console type
grunt clean:<yourTheme>to remove all static files.
Then, type:
grunt exec:<yourTheme>to create new static files.
(Whenever you are creating new LESS files inside your theme, you must generate new static content)
Now, you can write your own CSS inside that file and changes will be applied to your theme!
Oh yes, Don’t forget to trigger
grunt watch that tracks the changes in the source files, recompiles .css files, and reloads the page in the browser pages (you need to have LiveReload installed for you browser).
Overriding Theme-related LESS files
Similar approach as with extending your theme but difference is that we use exact LESS filename in order to override file in parent theme.
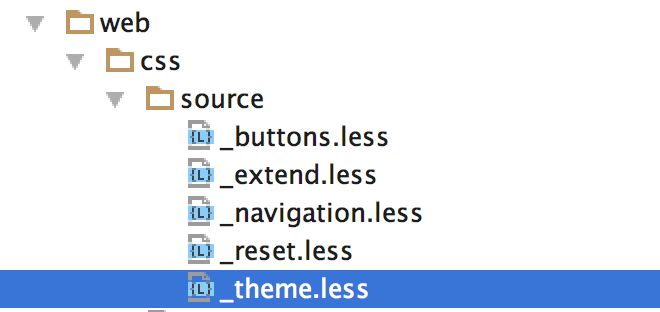
So, if you want to override _theme.less file and use your own variables inside your theme, do so by creating your own _theme.less file and place it here:
/Magento2/app/design/frontend/<Vendor>/<YourTheme>/web/css/source/_theme.lessExtending UI Library components
You can also extend files from LESS UI Library. For example, if you want to extend _buttons.less file, you need to create “_buttons_extend.less” file inside your theme folder:
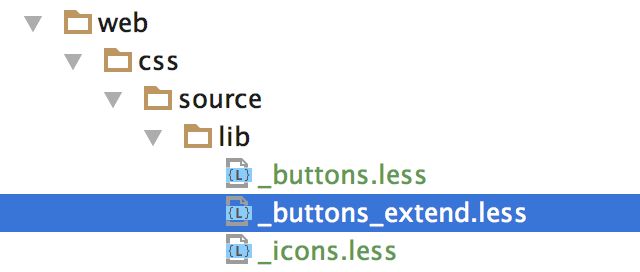
In _extend.less, register the _buttons_extend.less by adding the following code:
@import 'lib/_buttons_extend.less';Again, clean and generate your static files.
Overriding UI library components
Similar approach as with overriding theme files. If you want to override _buttons.less file, create new one inside your theme folder:
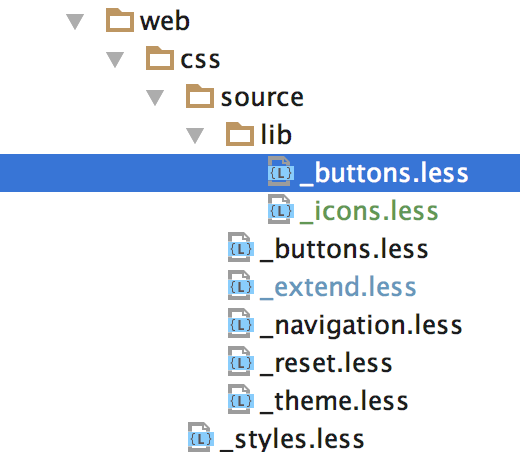
Again, don’t forget to clean and generate your static files.
Extending Module-related LESS files
As I mentioned above, module-related LESS files are located inside Module folder.
What if I like default styling of a certain module but I want to add some of my own CSS, just like I did with _extend.less for my theme?
Same as with extending a theme, we must create _extend.less inside module folder we wish to work with:
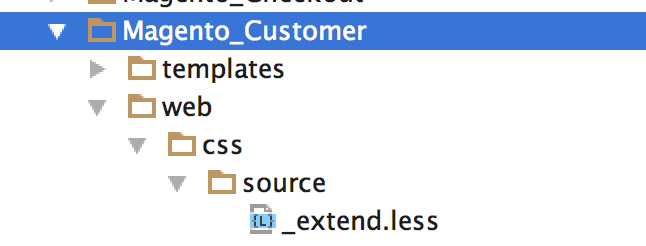
Clean static files, deploy new ones and you can write your css inside newly created _extend.less.
HINT: the best way to check if you properly extended theme or module files is to hover over Symlinked LESS file inside “pub/static” and see what is the real location of file.
If your file is located in “blank” or “luma” theme, you did something wrong.
Overriding Module-related LESS files
I think that now you are pretty much familiar with the process so I’ll keep it simple.
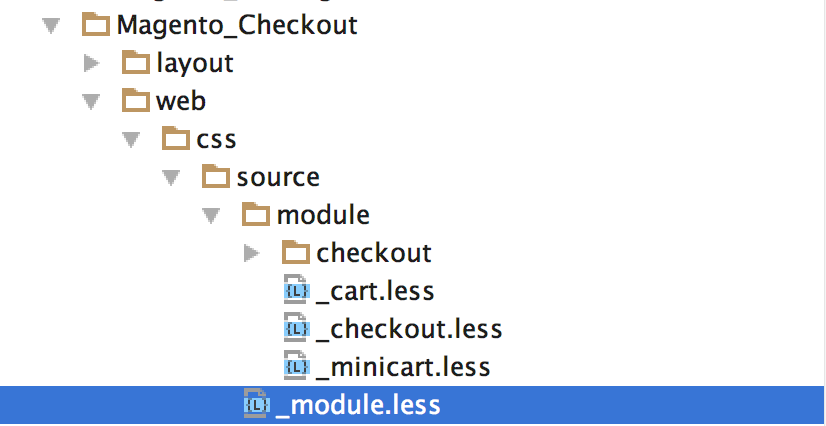
I created _Module.less inside my “Magento Checkout” folder and by doing that, I override parent theme module.less. Inside “module.less” I have @import directives for those 3 files that you see inside “module” folder.
Now I have full control of what will be loaded and I can easily remove, for example, “checkout.less” and/or add my own less file/s.
Adding new LESS files inside your theme
That one is simple. Create new file inside
Magento2/app/design/frontend/<vendor>/<yourTheme>/web/css/source/And then, inside _extend.less file, register that file with @import directive.
Enough,huh? 😀
Of course there are much more on this topic but those basic actions we went through will help you kickoff with your project.
However, if this or anything else regarding Magento development confuses you, we will gladly check out your site and offer technical insights on what to improve based on our detailed custom report. Feel free to get in touch!
Good luck and have fun 🙂
