Since Magento 2 is out for quite some time now and new projects based on the platform are rapidly approaching, there is no doubt that we, as developers, need to be adequately prepared for the challenge.
In this post I will demonstrate how to deal with platform’s default javascript components (widget instances). More precisely, a javascript component responsible for the site main navigation functioning. If you’re interested, just keep reading.
Introduction
Frontend part of the main navigation in Magento 2 is partly constructed with javascript logic responsible for the numerous actions spanning from transformations for mobile devices to hover delay timing for desktop computers. In most cases, default approach will suffice and will cover basically all requirements, but sometimes, in cases when a project requires specific/custom approach, sooner or later we’ll find ourselves in a situation to modify the default logic.
Let’s put ourselves in a position where our project requires certain modifications to the main navigation javascript part. First things first, we need to know some basic file architecture and technologies involved in the process.
Magento 2 uses Require JS which is AMD or asynchronous module loader and jQuery/jQuery UI library as a base for creating javascript components currently present on the system.
I won’t go further into requireJS but if you need to learn more about it, you can check out our blog post covering this topic in more details. Also, I would strongly suggest visiting requireJS site to get solid fundamentals of AMD and requireJS basic usage prior working with Magento 2.
Another important note is that jQuery UI widget factory is used to deliver easy extendable techniques, quite similar to old prototype class approach in Magento 1. If you’re not familiar with jQuery UI widgets, I strongly suggest visiting learn jQuery site with widget factory examples to get familiar with the concept.
Extending the defaults
Main file responsible for the functioning of the navigation menu is menu.js located under [project_root]/lib/web/mage/ among other default js system components.
Now, if we wan’t to extend or overwrite it, we’ll need to make sure we’re following these steps.
Step 1
To properly extend parts of menu.js with our custom content, first step is to map our js file so the system loads it instead of the default file.
Magento uses requirejs-config.js files to successfully map js components on the system. First thing that matters is to know where to place requirejs-config.js. It can be placed on several levels.
All requireJS configurations will be merged and executed in the following order:
- module level
- theme module level (parent theme)
- theme module level (current theme)
- theme level (parent theme)
- theme level (current theme)
Let’s see how it works with one real example. Default file is menu.js and we want to replace it with our custom one. Pay attention that I will still load default menu.js file afterwards as a dependency.
We need to create our file that will replace the menu.js file. Let’s call it menu-custom.js and place it under [current_theme]/web/js/ directory.
Step 2
Next, we need to create requirejs-config.js file and place it under [current_theme]/root directory. That way we can successfully map our file to replace the default one. See the example below:
var config = {
    "map": {
        "*": {
            "menu": "js/menu-custom"
        }

    }
};
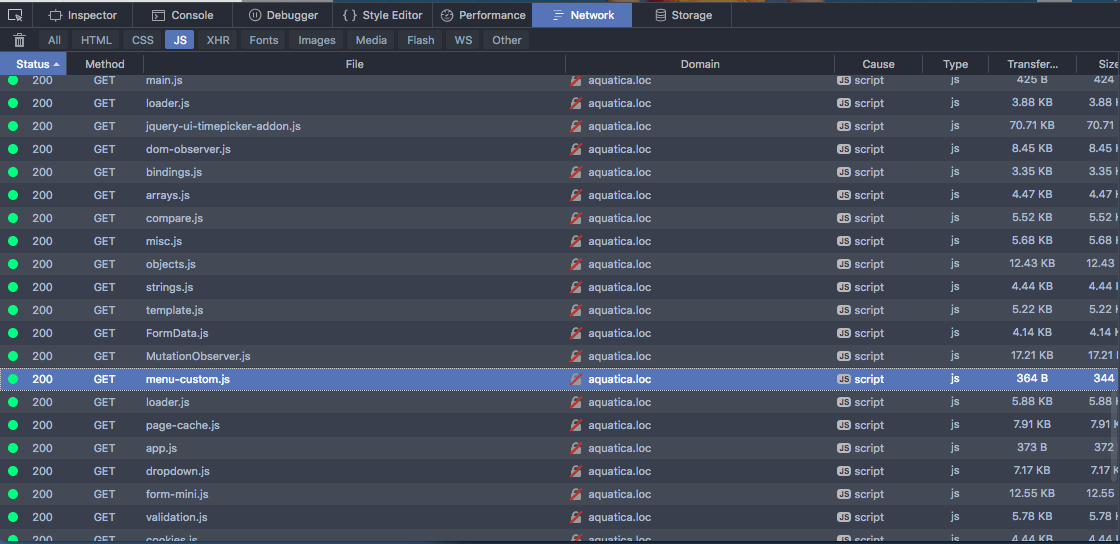
To be really sure if the procedure was a success, make sure to check in developer tools if the new file is loaded.

Step 3
Now the fun part! We wan’t to extend default functionality and this is where jQuery widget factory comes into play. We will place the following code to our newly created menu-custom.js file.
Check the example below:
define([
    'jquery',
    'jquery/ui',
    'mage/menu'
],
    function($){
        $.widget('inchoo.menu', $.mage.menu, {
            _init: function () {
                alert("I'm Inchoo");
            },
            toggle: function () {
                alert("I'm Inchoo");
            }
    });
    return $.inchoo.menu;
    });
What we can see from the above example is that we’re using require js to define our dependencies. First one is jquery, second is jquery/ui and the last one is mage/menu.
This means that our script will not be loaded until those 3 are fully loaded, because our logic depends on it.
Our custom widget instance called inchoo.menu is extending default $.mage.menu and in this example for the sake of this tutorial I’m extending two methods, _init and toggle. Toggle method is in charge to toggle navigation on smart phones and tablets while _init method is in charge for the component initialization.
Original toggle method example from default menu.js
toggle: function () {
            if ($('html').hasClass('nav-open')) {
                $('html').removeClass('nav-open');
                setTimeout(function () {
                    $('html').removeClass('nav-before-open');
                }, 300);
            } else {
                $('html').addClass('nav-before-open');
                setTimeout(function () {
                    $('html').addClass('nav-open');
                }, 42);
            }
        },
Overriding the file
In some cases (although in relatively rare ones) you will find your self in a position to completely override the menu logic (create custom navigation). In that specific case, we can apply step 1 and step 2 and create custom navigation logic in menu-custom.js file.
And that’s it! We’ve successfully extended default menu.js widget instance. Procedure can be applied to any widget instance currently presented on the system.
Hopefully this article will help someone looking to achieve the same goal.
In case you feel you need some extra help, we can offer you a detailed custom report based on our technical audit – feel free to get in touch and see what we can do for you!
Happy coding.


