First of all, this post is beginners guide about tracing in Magento. I’ve created 2 parts. First one is about how to find important parts in Magento core app – I decided to explain exporting collections to CSV (this requirement you’ll need on almost every project) and in second part we’ll go through Magento getCsvFile() method and explain some properties there. This first one is basic and I’ll lead you through steps “how to trace” steps from exporting to download process in Magento. If you’re already familiar with steps that we’ll do feel free to skip this post and jump to Part 2.
If you’re relatively new to Magento and you are not so familiar how grid containers works in Magento and where is placed Export to: CSV Export button keep reading.
Let’s start with tracing and explaining few steps before we implement new and improved functionality. This is required step when you want to implement something new on existing framework. You need to know how it works.
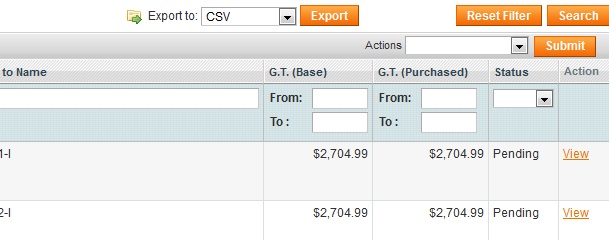
Starting place could be sales_order grid in Magento administration. If you visit something like http://magento1510.loc/index.php/admin/sales_order/ you’ll see “Export to: – CSV – Export” button.
Let’s find what will happen in code if we click on that “Export” button and why you have those options there.
If you open file app/code/core/Mage/Adminhtml/controllers/Sales/OrderController.php and search to see which Block is called, you’ll not find initial block that system will use for sales_order grid. Additionally, you can see next method in our controller:
/**
* Export order grid to CSV format
*/
public function exportCsvAction()
{
$fileName = 'orders.csv';
$grid = $this->getLayout()->createBlock('adminhtml/sales_order_grid');
$this->_prepareDownloadResponse($fileName, $grid->getCsvFile());
}
in app/code/core/Mage/Adminhtml/controllers/Sales/OrderController.php file. This method we’ll look more deeply eventually later, shortly, that’s the method that will be run if we click on “Export to CSV” button.
So if definition of our Block (View in MVC) isn’t in controller file, then it must be in layout folder. In default community edition (1510) (as you can see from my example URL) find file app/design/adminhtml/default/default/layout/sales.xml and look for node adminhtml_sales_order_index. If you are not using Eclipse or some other PDT you can search your Magento project by regular expression to find handle adminhtml_sales_order_index, or more precisely in app/design/adminhtml/default/default/layout folder.
Why we have “_index” at the end of our handle? If you look again our example URL, http://magento1510.loc/index.php/admin/sales_order/, you can see that we have frontName admin, sales_order is our controller name (…Sales/Order.php) and index is our default action (indexAction()), if action isn’t specified. If you visit http://magento1510.loc/index.php/admin/sales_order/index/ same result you’ll get on screen. Searching through Magento files, like searching for this handle, is developer daily routine. You can see node frontName in module’s configuration file, app/code/core/Mage/Adminhtml/etc/config.xml.
In file app/design/adminhtml/default/default/layout/sales.xml we can see, as some of us could guess, that our Block is placed in our adminhtml module, sales_order block: < block type=”adminhtml/sales_order” …
Now if you open file app/code/core/Mage/Adminhtml/Block/Sales/Order.php you can see that our block is actually container for other blocks (Mage_Adminhtml_Block_Sales_Order extends Mage_Adminhtml_Block_Widget_Grid_Container). In magic method __construct we can see that only _controller property is set to sales_order which implies that system will call some other blocks – and default templates (magento core team didn’t override anything in parent class).
Even in this Block we don’t have our template definition. So let’s now open extended class Mage_Adminhtml_Block_Widget_Grid_Container that is placed in app/code/core/Mage/Adminhtml/Block/Widget/Grid/Container.php file. Now in __construct() method we can see: $this->setTemplate(‘widget/grid/container.phtml’);.
File is located in app/design/adminhtml/default/default/template/widget/grid/container.phtml and in that file you can see call to < ?php echo $this->getGridHtml() ?>. Because we are in block Order.php and here we can’t see getGridHtml() method defined, we need to look in parent classes to see where it’s defined. So let’s first look in parent class Mage_Adminhtml_Block_Widget_Grid_Container. Here we can see that parent class has getGridHtml() method defined:
public function getGridHtml()
{
return $this->getChildHtml('grid');
}
Little digression.
But how to jump through various extended classes? If you’re using Eclipse or some similar PDT when you click on method/class name while holding the Ctrl button (Command button for Mac), it navigates to the page where the function or class is defined. Or you can put cursor on that method/class and press “F3”. Your PDT should jump to that class/method. You can read more here about how to use PDT with ZF. Remember that Magento is built on Zend Framework.
Let’s go back to our code.
What now mean getChildHtml(‘grid’)? Before we answer on that question let’s see properties of this class.
From child class we know about our _controller property ( $this->_controller = ‘sales_order’; ).
And from Container.php:
protected $_blockGroup = ‘adminhtml’;
Let’s now look in method _prepareLayout():
protected function _prepareLayout()
{
$this->setChild( 'grid',
$this->getLayout()->createBlock( $this->_blockGroup.'/' . $this->_controller . '_grid',
$this->_controller . '.grid')->setSaveParametersInSession(true) );
return parent::_prepareLayout();
}
we can see here that we are creating new child block ‘grid’ with block group name $this->_blockGroup.’/’ . $this->_controller . ‘_grid’, $this->_controller . ‘.grid’ and this answer our question what mean getChildHtml(‘grid’).
If we interpolate this we will get createBlock(‘adminhtml/sales_order_grid’, ‘sales_order.grid’).
‘adminhtml/sales_order_grid‘ is factory group name and ‘sales_order.grid‘ is the “name” of newly created block – similar as we would define it in our layout XML files.
Now we should open file app/code/core/Mage/Adminhtml/Block/Sales/Order/Grid.php. Here you can see what is set for our grid, in our sales_order controller, and why we see all of those information there (buttons, collection, mass actions, etc.).
Now let’s find method _prepareColumns() and at the end of that method try to add
$this->addExportType('*/*/inchoo', Mage::helper('sales')->__('Inchoo'));, just before line
$this->addExportType('*/*/exportCsv', Mage::helper('sales')->__('CSV'));Now you should have inside of _prepareColumns method 3 calls to method addExportType().
Now visit / refresh sales_order grid in Magento administration ( http://magento1510.loc/index.php/admin/sales_order/ ) and you should see “Export to: – Inchoo – Export” button. If you click on it, you’ll be redirected to 404. page http://magento1510.loc/index.php/admin/sales_order/inchoo/. Remember, when we added line $this->addExportType(‘*/*/inchoo’, Mage::helper(‘sales’)->__(‘Inchoo’)); we’ve actually created call to “inchooAction()” from sales_order controller. If you wish you can create method inchooAction() in sales_order controller with a following content:
public function inchooAction()
{
exit('we are here!');
}
and again you can click on export button – you should see blank page with “we are here!” content on it. So if you see it, we are on same wave! Revert any changes in core files.
Now we see meaning of line $this->addExportType(‘*/*/exportCsv’, Mage::helper(‘sales’)->__(‘CSV’)); and why we see option CSV for “Export” button in sales_order grid. Basically, we are calling method exportCsvAction() from our controller, app/code/core/Mage/Adminhtml/controllers/Sales/OrderController.php.
Content of method exportCsvAction():
/**
* Export order grid to CSV format
*/
public function exportCsvAction()
{
$fileName = 'orders.csv';
$grid = $this->getLayout()->createBlock('adminhtml/sales_order_grid');
$this->_prepareDownloadResponse($fileName, $grid->getCsvFile());
}
As we can see from code above, we are creating new adminhtml/sales_order_grid object and based on that instance inside _prepareDownloadResponse() method we are calling getCsvFile() method. getCsvFile() method is placed in file app/code/core/Mage/Adminhtml/Block/Widget/Grid.php and it returns an array:
return array(
'type' => 'filename',
'value' => $file,
'rm' => true // can delete file after use
);
Little digresion.
If you don’t know object’s class name, you can always type something like:
<?php
echo get_class($object);
exit;
?>
and at the bottom of your page (page source) you’ll see object’s class name – if $object is type of object.
Additionally, if you’re in some method and you know that Magento system will be in execution here in it’s request flow but you’re interested in all previous steps that Magento did in that process you can type something like:
<?php
//... we are in some method
throw new Exception ( "Stop with execution here and show me steps how did you come here!");
?>
and you’ll see full stack trace. Keep in mind that you need set display_erros(1); in index.php file + you can set developer mode to ON.
Let’s go back to our code.
Look closely inside method getCsvFile(). Shortly, Magento will grab whole collection and save that collection to specified folder as md5() CSV file. Then file will be eventually deleted:
$io = new Varien_Io_File();

$path = Mage::getBaseDir('var') . DS . 'export' . DS;
$name = md5(microtime());
$file = $path . DS . $name . '.csv';

$io->setAllowCreateFolders(true);
$io->open(array('path' => $path));
$io->streamOpen($file, 'w+');
$io->streamLock(true);
And we’re done! We’ve gone through all important steps. Now it’s time to see how we can rewrite Magento export functionality and enhance it little bit.
In our next step we’ll modify call to $this->_exportIterateCollection(‘_exportCsvItem’, array($io));, but more accurately we’ll create new getCsvFile() method. Let’s call new method getCsvFileEnhanced() just to see how we can rewrite existing method or add new on top of existing functionality. Note, if we decide to add our new method with a same name that Magento already has in our scope, we’ll overwrite it, but if we add a new name, as we’ll do in next post, we’ll actually extend core functionality. Step2: Enhanced export – collection to a file.


