
Follow these steps to connect your Google Analytics 4 to Magento 2 store through Google Tag Manager!
This post has been updated, as the previous one had instructions for Universal Analytics (GA3) and Magento 1. Enjoy the refreshed instructions below.
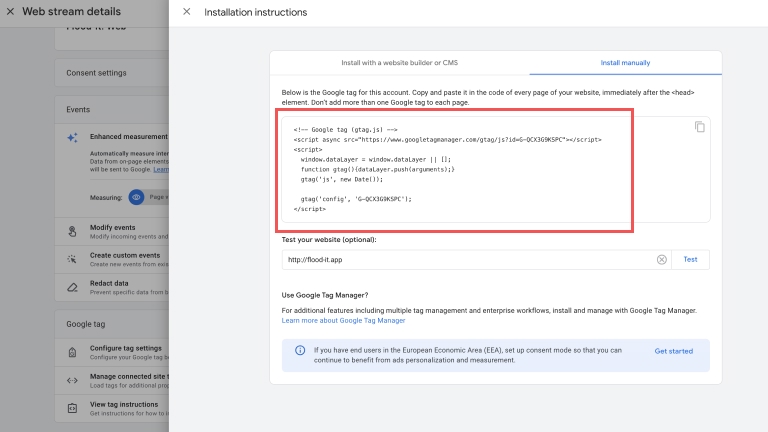
The most basic way to connect your Google Analytics 4 (GA4) property to any site is by inserting the Google Analytics 4 tracking code in the <head> element of every page you want to track. You can find the code by taking these steps:
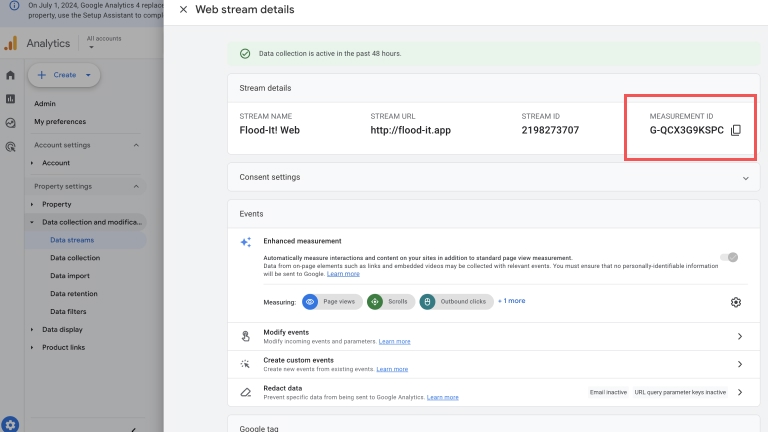
- Go to GA4 property Admin
- Then Data Collection and Modification
- Select Data Streams
- Click the Stream for details
- Select View tag instructions
- Switch the tab to Install manually
You can also use one of many Google Analytics Magento extensions. After the extension is installed, it’ll ask for the Measurement ID — the number of your GA4 property, which can be found in step 3— in the Data Stream details.
To install any of these extensions, follow their instructions.
Installing Google Analytics using Google Tag Manager
While you can connect Google Analytics by placing its code into the <head> element or using an extension, using Google Tag Manager is, in fact, the best way. Google Tag Manager gives you many management options when handling Google Analytics and different marketing platforms such as Google Ads, Facebook Ads, Pinterest, TikTok, and many more; thus, it enables enhanced eCommerce events to collect information about your customers’ shopping behavior.
You can read more about why we feel using GTM is the best way to connect your eCommerce site to Google Analytics here.
1. Create a Google Tag Manager (GTM) account and container
Visit Google Tag Manager Home and click the “Start for free” button. If you’re logged into your Google Account, you’ll see the “Add new account” interface asking you for your
- account name (usually company name),
- country, and
- platform (in our case, it’s web).
After this step, you’ll enter Google Tag Manager, where you’ll see the installation instructions.
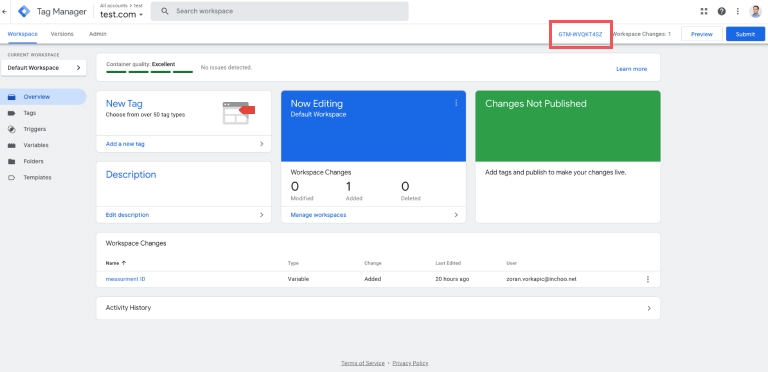
If you close the pop-up with instructions, you can always find these instructions by clicking on the Container ID in the top right corner.
2. Install the Google Tag Manager 2 Extension
We can’t suggest any particular GTM extensions as they all do the job. The best thing for you is to Google them and choose the extension with the features that best suit your needs.
Here at Inchoo, we have worked hard to create our own performance-aware GTM extension, which we provide free of charge for our clients.
Regardless of the extension provider, connecting GTM to the extension is more or less the same.
3. Connect your GTM container with the Magento GTM extension
Open your GTM container, and you’ll see the previously mentioned Container ID in the top right corner.
Open your Magento GTM extension configuration and find the appropriate field to paste the Container ID.
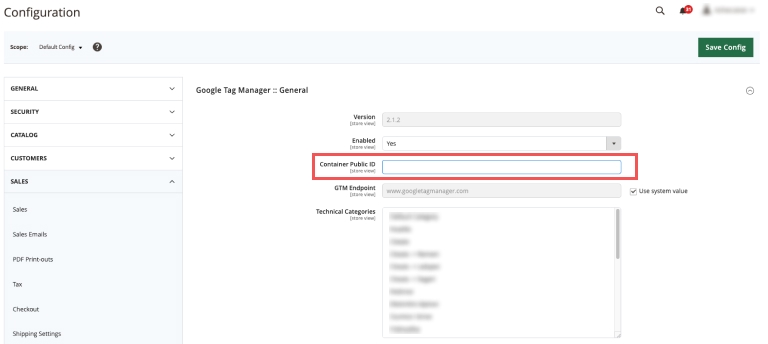
Once you save the configuration, you can check your site’s source code and search for the Container ID in the markup to verify the installation.
4. Create a GA4 configuration tag in GTM
Assuming you have already created the GA4 property (if you haven’t, check out this article), now’s the time to add GA4 to your site through Google Tag Manager.
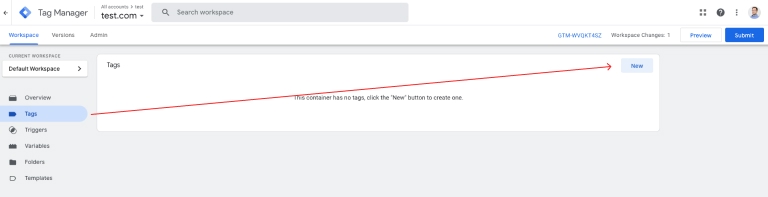
Select “Tags” from the sidebar navigation and hit the “New” button.
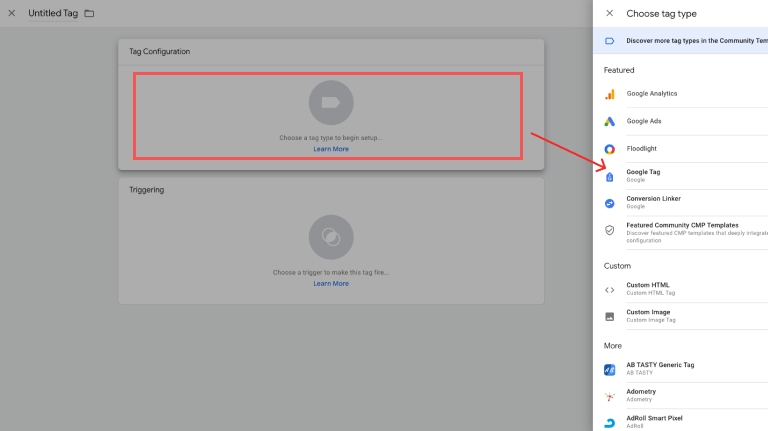
Once the new tag interface appears, click the whitespace under the “Tag Configuration” title and select “Google Tag” from the list.
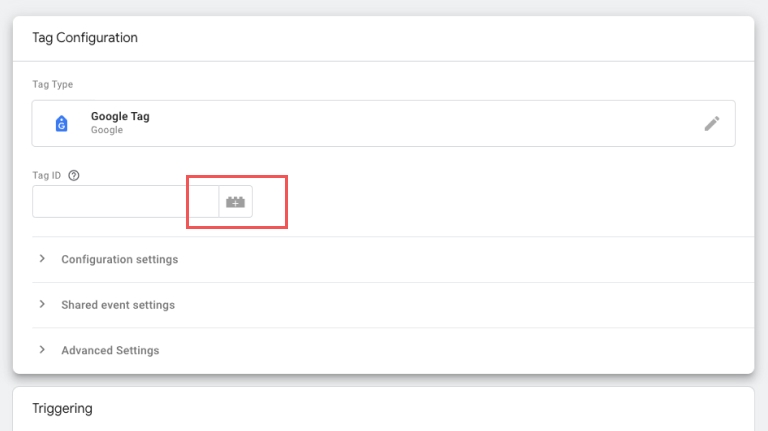
Once you add Google Tag, it will ask you for your Tag ID — your GA4 Measurement ID.
Since this information will be required each time a new tag is created, and you probably don’t want to copy-paste it each time, placing the Measurement ID into a variable is a good idea.
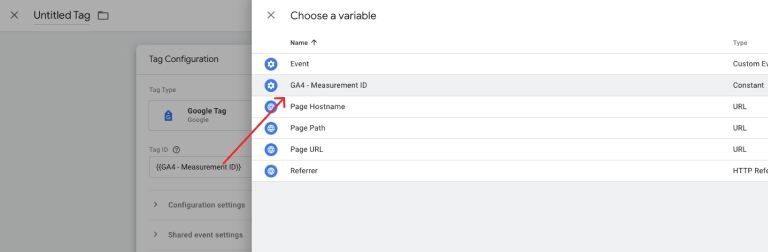
Click the little Lego icon next to the input to proceed.
In the next interface, hit the plus icon in the top right corner to trigger the new variable interface.
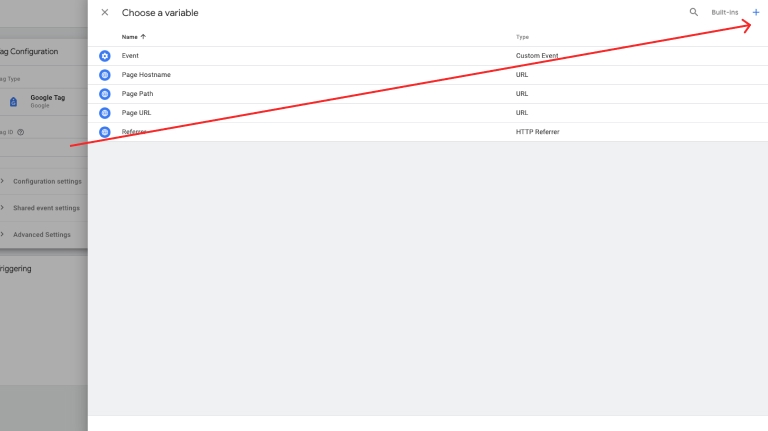
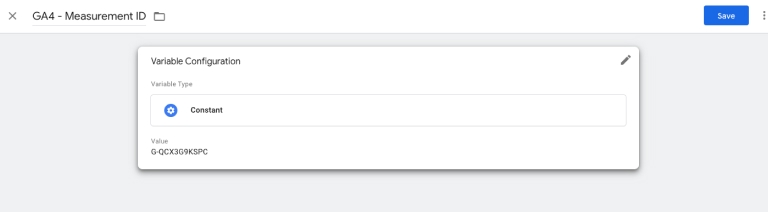
Like before, click the blank space under the “Variable Configuration” title and select “Constant” from the list. Paste your GA4 Measurement ID into the “Value,” give the variable a meaningful name (GA4 – Measurement ID will work fine), and save it.
GTM will automatically populate the Tag ID in your new tag configuration with your new variable, and in the future, click the lego icon and select your variable when you need to add GA4 Measurement ID to a tag.
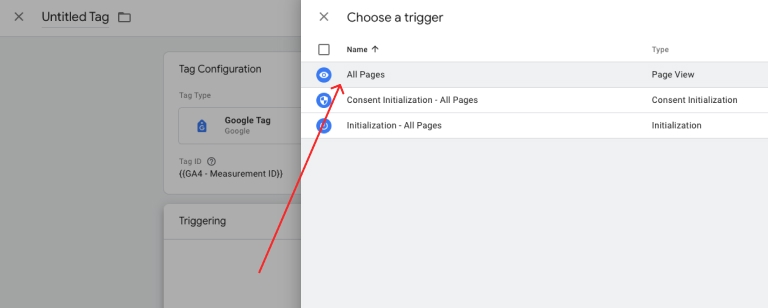
Now click the whitespace under “Triggering” title, and select “All pages” from the list.
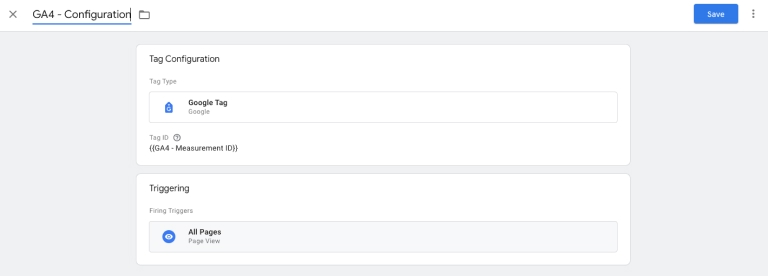
Give the tag a name “GA4 – Configuration” and save it.
And that’s it. You have connected your Google Analytics property to your Magento webshop with Google Tag Manager!
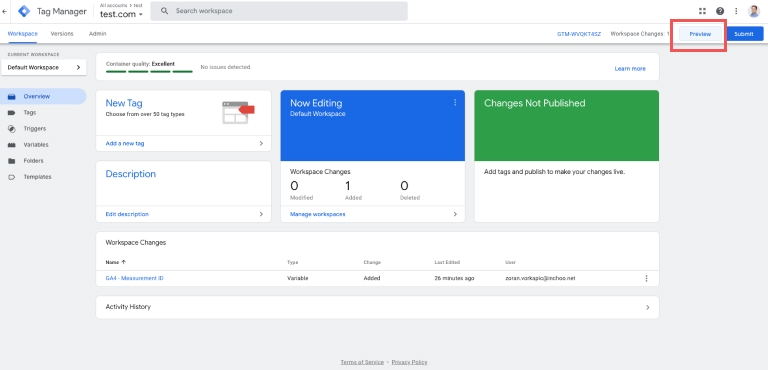
5. Test your connection in GTM Preview Mode
You can test the connection using GTM’s preview mode.
Hit the preview button in the top right corner of GTM’s interface and type the URL for your eCommerce site.
GTM will open your site in another tab. If the connection isn’t successful, GTM will send you a message saying the tag has not been found on the site. You should see a page_view event when GTM opens your site in another tab if it is successfully connected. Continue to browse through your webshop and observe what events are starting to show in the preview mode!
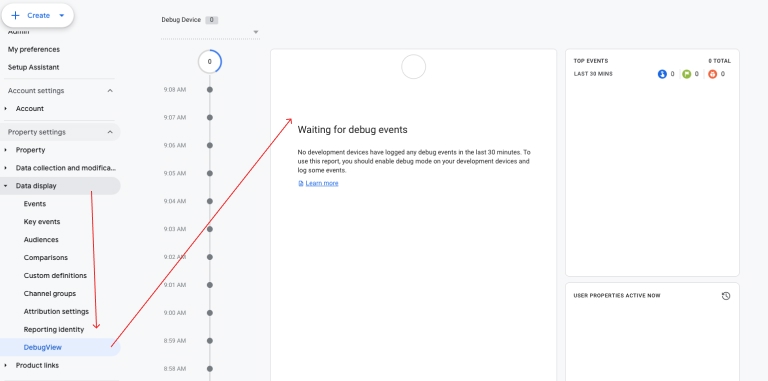
6. Test your connection in Analytics Debugger
Besides testing whether the GTM connection works, you should check whether Analytics receives data from your eCommerce site.
Open analytics property admin and go to Data Display > Debug view.
Reload the GTM preview mode, and you should see the same page_view event that happened when the GTM opened your webshop in another tab.
This means your Google Analytics receives hits and is connected to your webshop. Continue browsing your site and observing what events are starting to show in the DebugView in Google Analytics!
If you want to continue and set up Enhanced eCommerce events, feel free to reach out to us!