How to upgrade to Google Analytics 4?

There are many how-to blog posts out there, so this will not be yet another one. Instead of the technical step-by-step guidance, I’ll share my experience with implementing Google Analytics 4 with Google Tag Manager (GTM) on Magento 2 store and what to keep in mind when activating the GA4 property.
Of course, I’ll also provide you with how-to, step-by-step blog post links that helped me to initially configure GA4 and start receiving insightful information about visitor activity. If you don’t already use Google Tag Manager (GTM), now is the time to start. Because you won’t need to add another code in your HTML head tag and thus negatively affect the performance of your webshop. The only code in the HTML of your webshop will be the GTM container code.
How to properly configure GA4 and what to do with Universal Analytics (UA/GA3)? Should I replicate all my tracking tags from there? What if I’m starting from scratch? Many professionals in the analytics industry have analyzed the pros and cons of GA4, compared it with GA3, and tested it. If you want to dig deeper into the details and differences between the two GA properties I suggest reading this blog post. After configuring several GA4 properties, reading all the blog posts that I found useful, and after listening to what other experts said on the topic in this year’s Mesuresummit, I’ll give you here my two cents.
Why GA4 is a must?
Because Google announced that all standard UA/GA3 properties will stop processing new hits on July 1, 2023. It will be the one and only Google Analytics property. The sooner you start to collect data and start to learn how to use the new platform and read the data, the better.
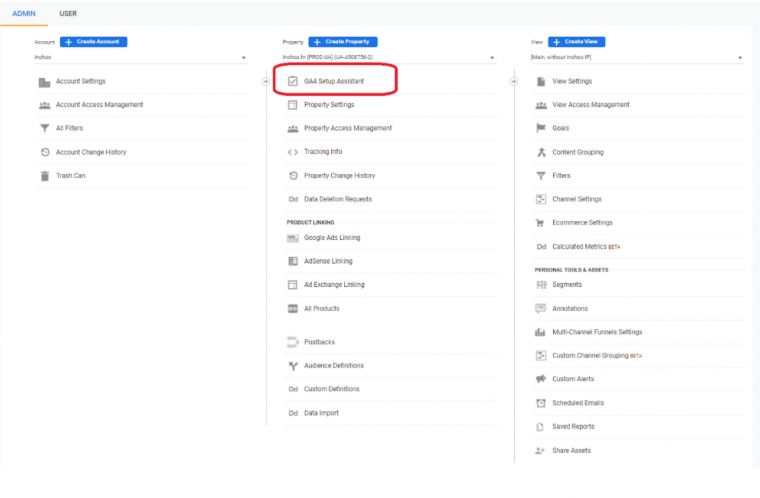
Currently, the GA4 property is already the default property when creating a new one. However, you can also open Universal Analytics (GA3) as an “advanced” option. If you already have the GA3 property, then just click on the Setup Assistant and follow the instructions. Among many step-by-step tutorials on the web, I’ll recommend this one – how to initially set up the GA4 property and this one – GA4 setup tips.

What basics to keep in mind when setting up GA4?
Increase the event data retention to 14 months.
By default, the data retention is set up to 2 months. Increase it to maximum possible 14 months.

Activate Internal Traffic data filter.
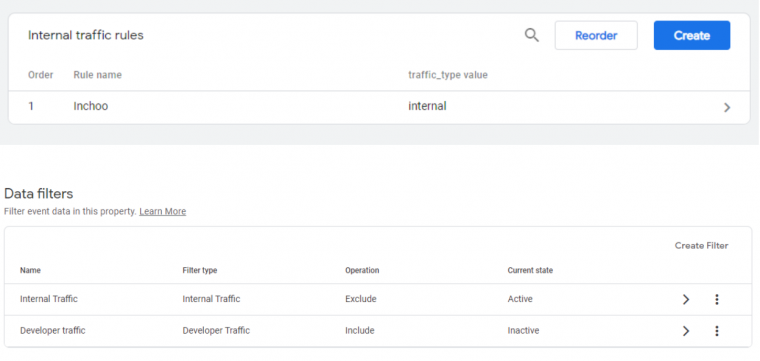
Another thing where I have been slipped is the Internal Traffic filter setup. It’s really easy, you just click on Data Streams > More tagging settings > Define internal traffic > Create. And then just enter e.g. your company IP address because you don’t want to include your clicks in visitor analysis data and voila – your internal clicks continue to appear in GA4. Why? Because the Internal Traffic option is not activated by default. Internal Traffic data filter must be activated in Data Filters. By default, the value is set to Testing.

Check if you receive the data only for the hostname you want to track.
Be sure to check from what hostname is GA4 collecting data. You want it to be only your webshop hostname. GA4 does not have a views option like GA3 where you can filter hostnames. The best practice for hostname filtering in GA4 is to do it through GTM. You can find here this step-by-step process nicely described.
Create enhanced eCommerce events in GA4.
The new GA4 is tracking some events by default, like page views, scrolls, outbound clicks, site searches, video engagements, and file downloads. Enhanced eCommerce events like product views, add to cart, checkout options are not predefined and you have to set them by yourself.
The event concept in GA4 is different than GA3, but despite that, you can set up GA4 events relatively easily with your existing enhanced eCommerce setup (precisely, with your current enhanced eCommerce data layer)
Google Analytics defines the structure and parameters for all events. The parameters for Enhanced eCommerce events are quite different than how are they defined in GA3 enhanced eCommerce Data Layer. To update the key-value pairs in the Data Layer, usually, you would need to ask a developer for help. Instead, you can use Simo Ahava’s custom variable template in GTM that will convert enhanced eCommerce purchase data to the defined GA4 purchase data parameters. Here you can find out how can you properly set up enhanced eCommerce events in GA4 with the existing GA3 enhanced eCommerce data layer on your webshop. That’s the fast and temporary solution before you get the matching data layer data in your GTM extension or your developers configure the GTM extensions data layer to be compliant to GA4. After the depreciation of Universal Analytics, you will definitely need to have a GTM extension that’s compliant with GA4. Inchoo developed our own GTM extension and the usage and maintenance are free for our clients.
If all this sounds too much technical to you, or you simply don’t have the time to properly set up the GA4 property yourself, then it is best to assign the job to someone who did it before like we at Inchoo have done it many times. So, without any obligation, feel free to contact us and we will do our best to set up your tracking and help you achieve your business goals. Check out the service that helps you implement Google Analytics 4 with GTM and let us do the work for you!


8 comments
GA4 implementation is a must from next year, so all online eCommerce businesses have less time to understand its functionalities; I think handing it over to a professional now is the best option what do you think?
Awesome, This list is really amazing and helpful for all beginners as well as professionals. Thank You so much for sharing this Blog with us… Excellent Blog!!!!
Really great and in-depth content. Thank you so much dear for this beneficial post.. You are great!!. Really appreciate your hard work.
Great Information…!!! I must say all the beginners will love your post. It is so informative and everything in this blog was explained very well. Thanks for sharing…. Keep Doing!!
Thanks for posting the nice information! All contents were expressed in a clear n simplified manner n it was meaningful too. Good work!
It’s a really challenging decision to shift from GA3 to GA4 although GA4 is more advanced. I think this article helps people decide and understand why they need to migrate to GA4. Helpful content so far.
Thanks a lot for sharing the blog. the information you shared is just awesome and very helpful.
Thanks Andy, I’m glad it helped you. Is there something you wanted to know more about?