SEO can be overwhelming and challenging to navigate, but the right tools can provide clear direction and assistance. Google Search Console is a great tool for web owners to monitor, maintain, and troubleshoot their website’s presence in Google search results. Everyone can use it, including developers, experienced web owners, and those who are not entirely sure what it is used for.
If you identify yourself as part of the latter group, don’t worry. This SEO self-assessment guide is specifically tailored for users unfamiliar with this tool’s capabilities. Here are five steps you can easily take to address any potential issues with your organic performance.
1. Performance: Search Results Report
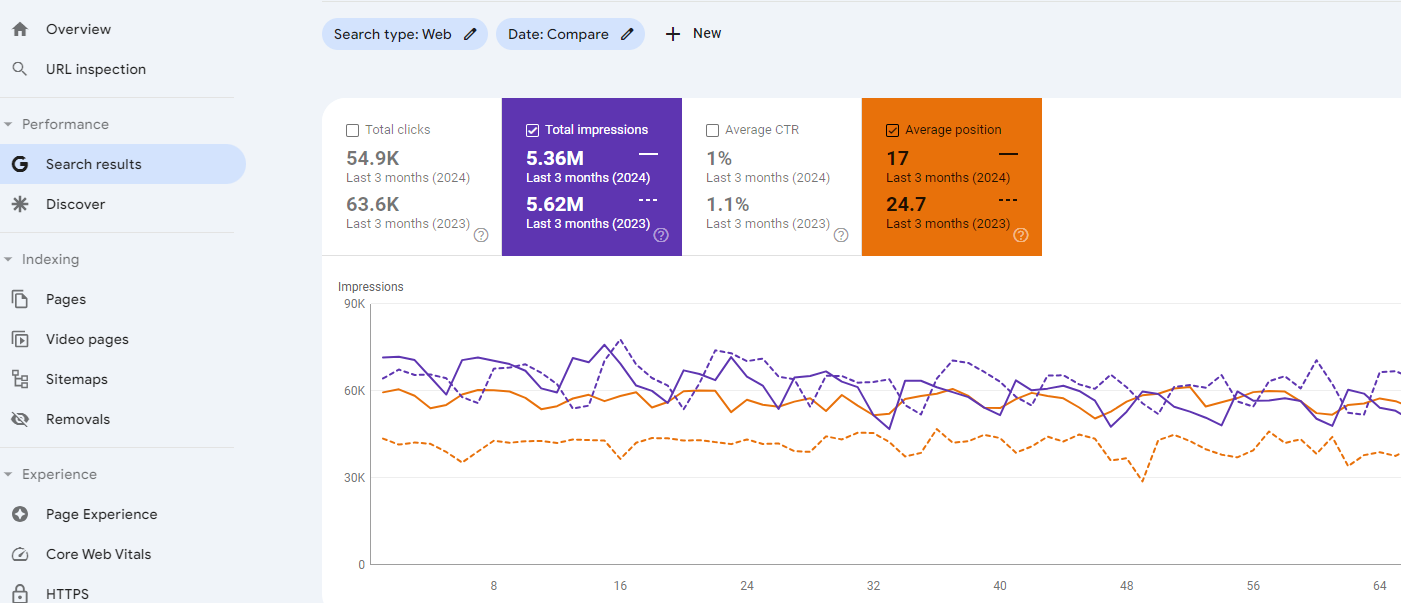
The Search results report shows important metrics about your website’s performance in Google Search results. Here is how you can quickly address potential issues with your site’s organic performance.
- Analyze organic performance: Check for any unexpected drops in impressions, clicks, CTR, or average positions. For better insights, use filters on the top to compare different periods.
- Analyze Queries: In the bottom section of the report, review the list of queries bringing traffic to your site. Additionally, check if you are losing impressions and clicks for important queries for your business. Furthermore, filter by specific queries to see if pages are competing for impressions, which may disperse the ranking potential.
- Analyze pages: Check if any pages are losing impressions and clicks. Filter by specific page and analyze queries bringing the most of the traffic.
2. Indexing: Pages Report
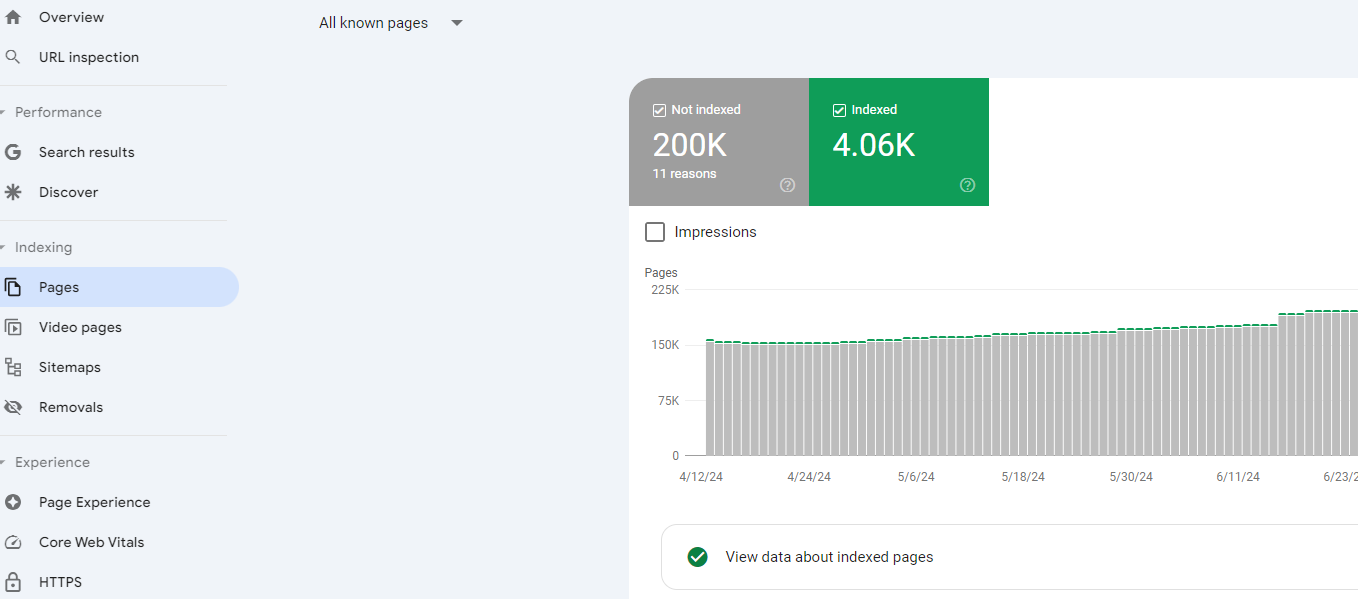
The summary page displays a graph and count of indexed and non-indexed (but requested) pages. The bottom section includes reports showing the reasons for not indexing certain URLs and suggesting other improvements.
Do a quick analysis of indexed pages:
- Too many indexed pages may mean that some irrelevant pages (from the SEO point of view) are indexed, which can cause duplication or other problems. For reference, you can compare the number of submitted pages in the XML Sitemap (All known pages -> All submitted pages), which should contain all pages meant for indexing.
- Click on the View data about indexed pages tab and check indexed URL examples. If you notice many URLs with added filtering or sorting parameters (e.g., ?price=, ?color=, ?product_list_order, etc.) or URL paths characteristic for user pages (e.g., checkout, customer, catalogsearch, etc.), your indexing strategy probably needs revision. You can use filters in the right corner to speed up the process.
3. Indexing, Pages: Why Pages Aren’t Indexed Report
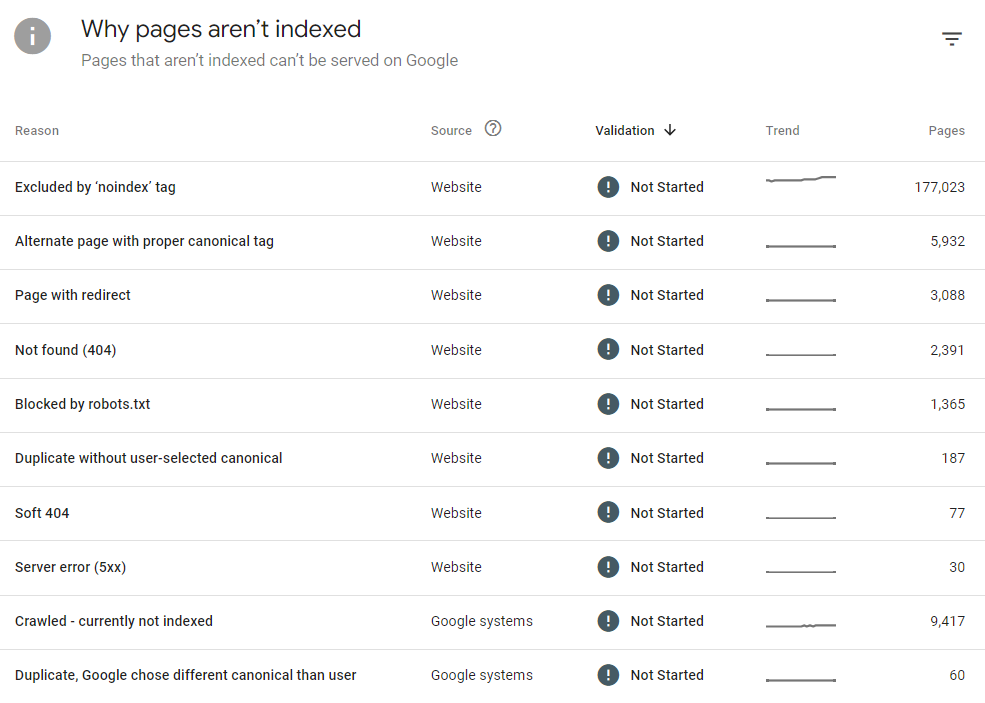
Another important step in your SEO self-assessment is to check why pages are not indexed reports, which can provide valuable insights into potential indexing issues. While these reports cover various reasons behind non-indexation, for the self-assessment, let’s focus on the following report:
- Blocked by robots.txt: This report displays examples of URLs where your website’s robots.txt file is blocking Googlebot from crawling. In other words, Google is trying to access the page but is being prevented by the robots.txt file, so the page cannot be indexed. Analyze the report to see if any important pages should be indexed. If you find them, this could mean that your robots.txt file is not configured correctly.
4. Robots.txt & Sitemaps Errors
This step is straightforward and quick. It allows you to check if these important files for your website performance have any issues and ensure they function properly.
- Sitemap.xml: Under Indexing, go to Sitemaps. Check the status; if it is “Success,” the sitemap was fetched and read without errors. The status column might also contain possible sitemap errors, including fetch and parsing errors. It is best to report these to your development team.
- Robots.txt: Under settings, go to robots.txt. Check if the status is fetched and if there are any issues while parsing the file listed in the Issues column. Google ignores the lines with issues and uses those that it can parse. If the status is “not fetched,” this means some issue occurred when Google requested the file. Your development team should check it.
5. Page Experience Report
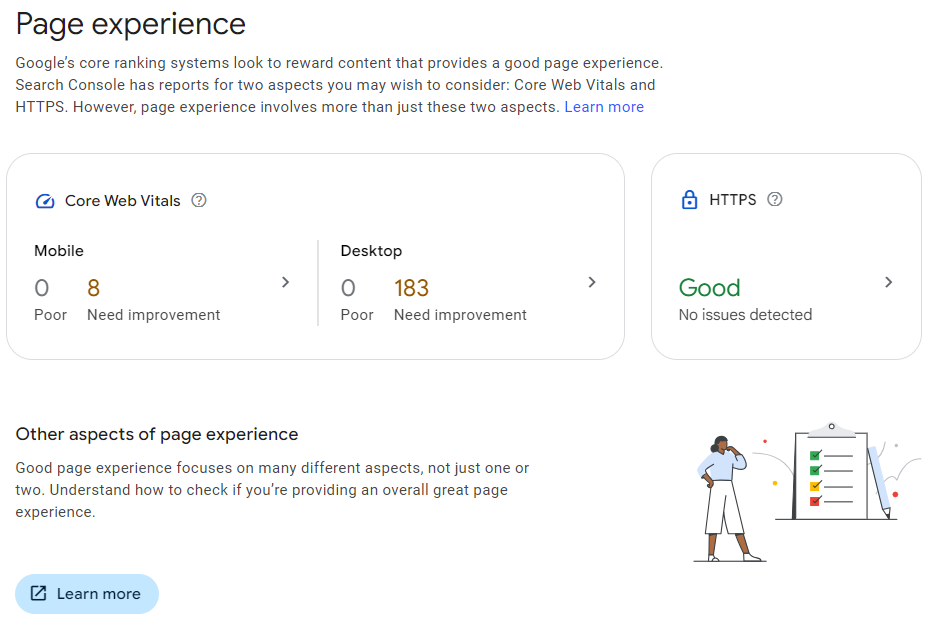
The final step of your SEO self-assessment is to check the Page Experience Report. It gives us insight into the website’s user experience. Although page experience metrics cover different aspects, for this report, Google evaluates Core Web Vitals (CWV) and HTTPS usability. You can easily check if your website’s performance in this field has any serious issues.
- Go to the Page Experience report and check CWV for mobile and desktop. If there are a significant number of URLs with Poor or Need improvement status, your website might not provide a good user experience, which can negatively affect its organic visibility or user engagement. This is a developer topic, so they should analyze it further and suggest improvements.
- Go to HTTPS usability and check the status. All pages should be served through a secure connection.
Your Next Steps
Congratulations, you have passed the 5-step SEO self-assessment for your online store. However, it is important not to stop here. This should only be the beginning of a deeper exploration of these and other reports available in this great tool.
If you find yourself feeling unsure or overwhelmed, don’t hesitate to reach out for a Mini SEO Audit. We’re here to support you every step of the way and make your SEO journey as smooth as possible!


