Assuming that you already installed PHPUnit because there are already many tutorials about that, I will write just one short tutorial about setting up test environment for Zend application. I am currently using windows 7, and NetBeans IDE for php 6.9.1. First we have to setup some PHPUnit options in NetBeans, so go to:
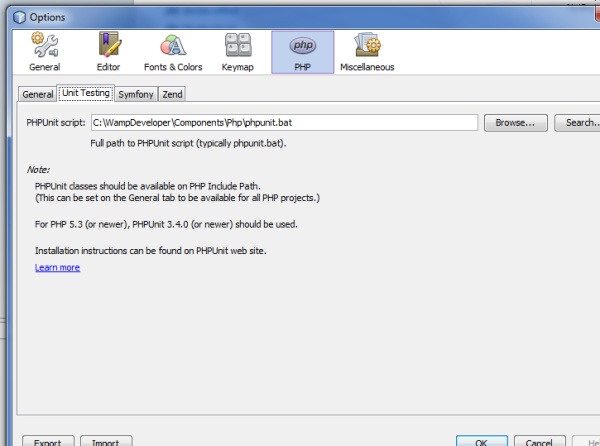
Tools -> Options -> Php -> Unit Testing
and click on Browse and choose location of your installed PHPUnit script (phpunit.bat) which is often located in php – installation folder and click OK to confirm selection.

Now we can create new Php project based on Zend framework, or open some existing Zend project in which we will write our first test. In NB I am using Zend tool integration to generate first project sources.
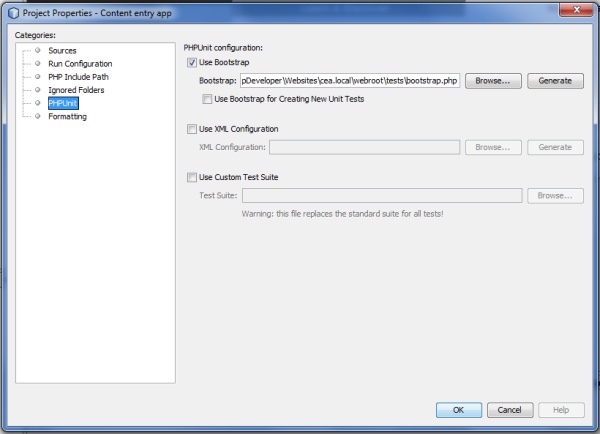
When the project is opened/created, in projects window right click on project name and choose Properties.
After the project properties window is opened, click on PHPUnit category on the left side, and on the right of the window we can see PHPUnit configuration options. For this tutorial, let’s select “Use bootstrap” option and click “Generate” button on the right, so new bootstrap.php file is generated inside folder “tests” of our Zend application.
In that file we will put all basic configuration for our application testing and necessary include paths like this:
bootstrap.php
<?php
error_reporting( E_ALL | E_STRICT );
ini_set('display_startup_errors', 1);
ini_set('display_errors', 1);

define('APPLICATION_PATH', realpath(dirname(__FILE__) . '/../application'));
define('APPLICATION_ENV', 'testing');
define('LIBRARY_PATH', realpath(dirname(__FILE__) . '/../library'));
define('TESTS_PATH', realpath(dirname(__FILE__)));

$_SERVER['SERVER_NAME'] = 'http://cea.local';

$includePaths = array(LIBRARY_PATH, get_include_path());
set_include_path(implode(PATH_SEPARATOR, $includePaths));

require_once "Zend/Loader/Autoloader.php";

$loader = Zend_Loader_Autoloader::getInstance();
$loader->setFallbackAutoloader(true);
$loader->suppressNotFoundWarnings(false);

Zend_Session::$_unitTestEnabled = true;
Zend_Session::start();

?>
When this is done, let’s write first controller test case to see if that’s working properly.
(In my current configuration, when I create new controller in project using Zend tool integration,
there is also new file created inside “tests/Application/Controllers” folder named “Original_controller_nameTest.php”).
If controllerTest is not created , we can always create it manually.
Create new php class document and save it inside “tests/application/controllers/” folder and give it a name: “IndexControllerTest.php”.
Enter code inside like this:
<?php

class IndexControllerTest extends Zend_Test_PHPUnit_ControllerTestCase {

public function setUp() {
$this->bootstrap = new Zend_Application(
'testing',
APPLICATION_PATH . '/configs/application.ini'
);
parent::setUp();
}

public function testHomePageIsASuccessfulRequest() {
$this->dispatch('/index');
$this->assertFalse($this->response
->isException());
$this->assertNotRedirect();
}

public function tearDown() {
/* Tear Down Routine */
}

}
Now it’s time for testing: right click on the project name in projects explorer and choose “Test” or press Alt+F6 combination to run tests.
If everything is set up properly, then you will see test results in “test result” window.


