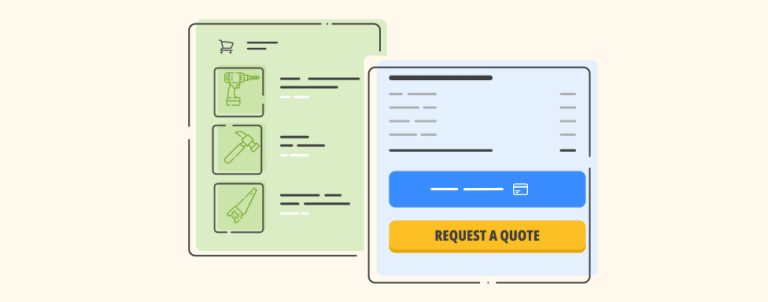
Thinking about how to make your products stand out from the crowd and be more visible on Google Shopping? You are already familiar with that “special offer” link that can be added to Google Shopping listing but aren’t really sure how to set everything up to get one?
Digging for some meaningful, usable and easy to follow guide that would cover all the steps you need but won’t overwhelm you at the same time because of tons of options? Search no more!
We have been in Magento and Google Ads business for quite some time. That’s why we know how time-consuming it can be to set the promotion you want while staying aligned with Google’s guidelines.
We’re embarking on a series of articles where we’ll show you how to set everything you need for several types of promotions that we believe are the most common ones. Since we are specialized in Magento, we’ll add a tutorial on how to set everything up from Magento, as well as Google Merchant Center side, so you have everything in one place.
We’ll start this series with one simple promotion type: 20% off on all backpacks. So let’s get started.
For all of you who don’t run your store on Magento, save your time and just jump to the Google Merchant Center setup part.
Magento side
Special offer promotion is going to be redeemable with the coupon code. So, the first thing we should do is to set up a cart price rule and define the coupon code.
Magento price rules give you lots of different options to choose from. But to be as clear as possible on the steps you should take in this specific case, I’ll just walk you through our setup and won’t get into details about all the options.
Navigate to Marketing > Cart Price Rules
Click on “Add New Rule” and fill in the rule information.
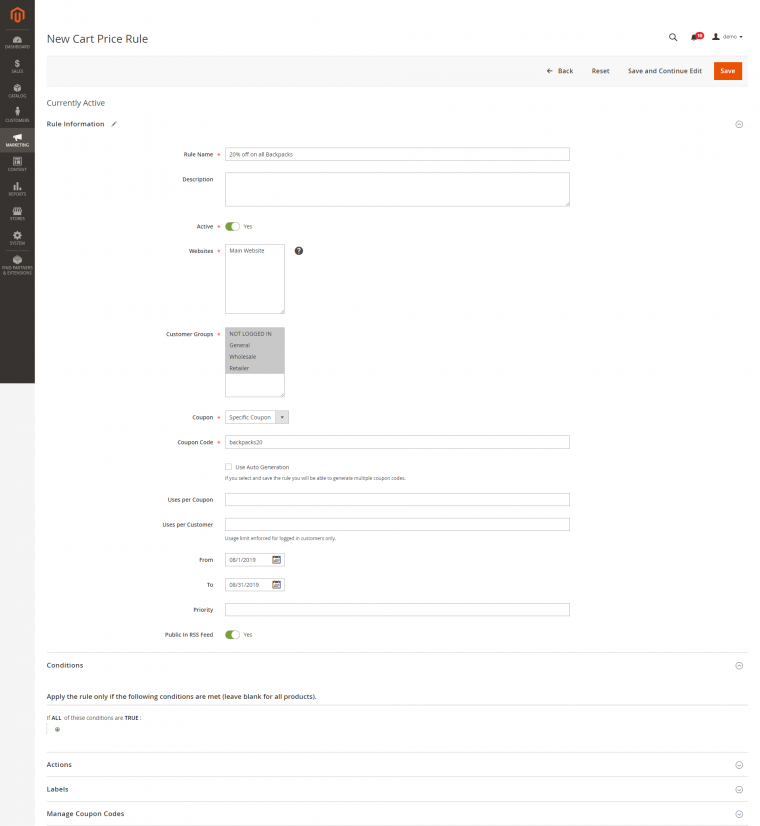
The next thing to do is to define conditions that must be met for the products to participate in the promotion. Click on “Conditions” and choose the combination of available values to suit your purpose. In our specific case, we did the following:
Click on the “Add” button (little, green plus sign), choose “Product attribute combination” from the dropdown.
Next, click on the “Add” button below and choose “Category” from the dropdown (screenshot below).
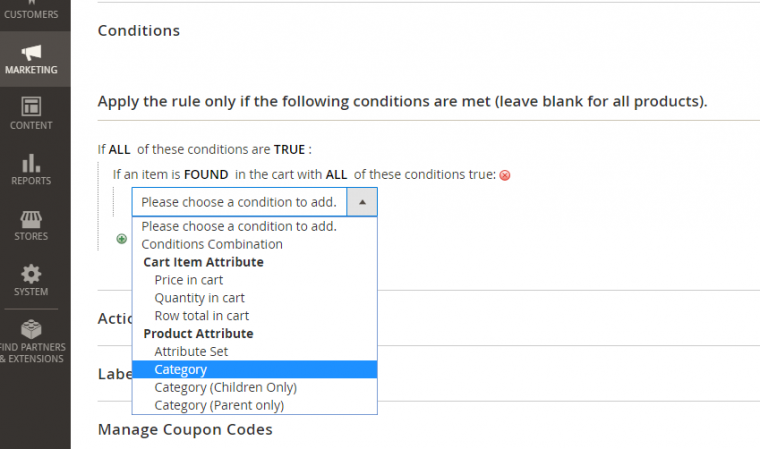
Click on three dots in “Category is … “ and then click on “Open Chooser” button which will open the category tree where you should select the category where you want to apply the discount.
The next step is “Actions”. Screenshot below.
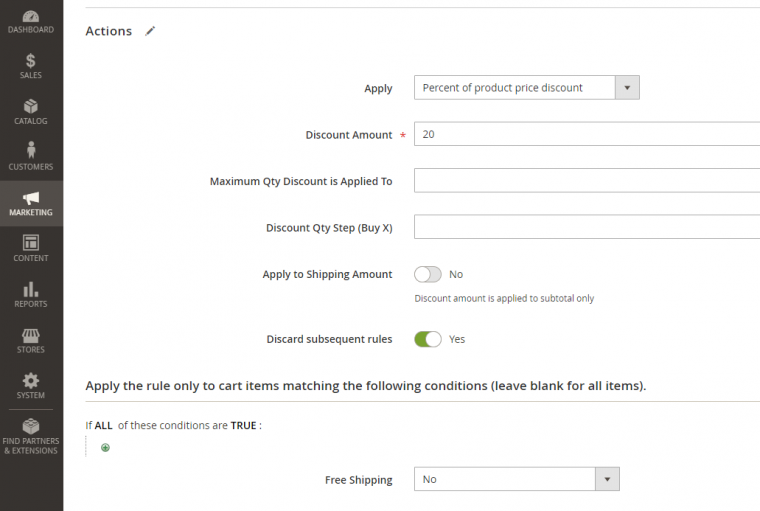
The last thing to do is to enter the text for the label in the next section and you can hit “Save”.
After we have our cart price rule set up, we’ve defined the start and end dates for the promotion, as well as the coupon code, the next step is to deal with the Google Merchant Center part of the job.
Google Merchant Center side
Google Merchant Center lets you set the promotion in 2 ways.
The first way is to create a Promotion feed.
We would like for this article to be a basic level read so I won’t be covering the promotion feed this time. I’ll save it for the other posts that are going to be published in weeks to come.
Second, the most simple way is to use the Promotion tool.
The Promotional tool gets handy when you have a small number of products to promote or when you are promoting items that fit into a certain category in a straightforward way. It offers different promotion categories and types and it is quite intuitive and easy to use.
In case some specific situation doesn’t get in the way (which of course happens too often and I’ll write about that below as well), it basically requires you to do only a few clicks and your promotion is ready to start the approval process. We’ll walk you through this simple set up process where we used product_type to define items that will participate in the promotion.
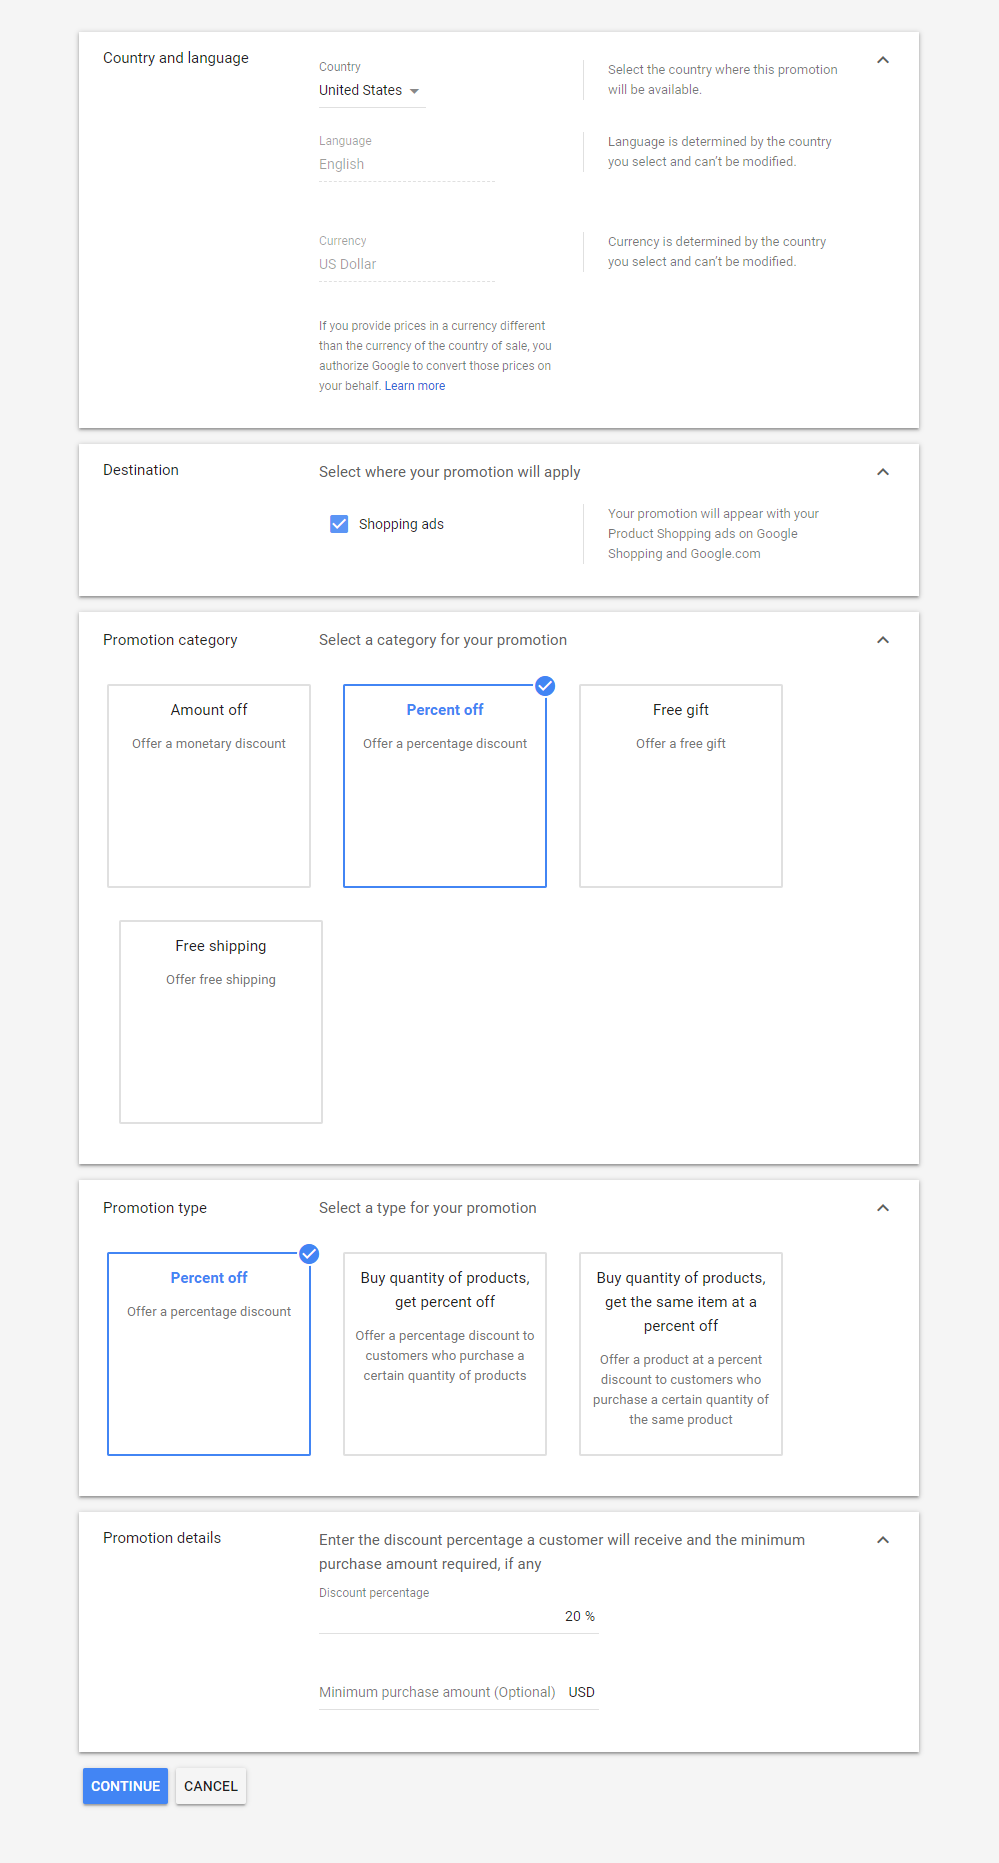
Navigate to the Promotions tab and click to “plus” button. Select the country where the promotion will be available and hit “Continue”. The rest of the steps are visible in screenshots below:
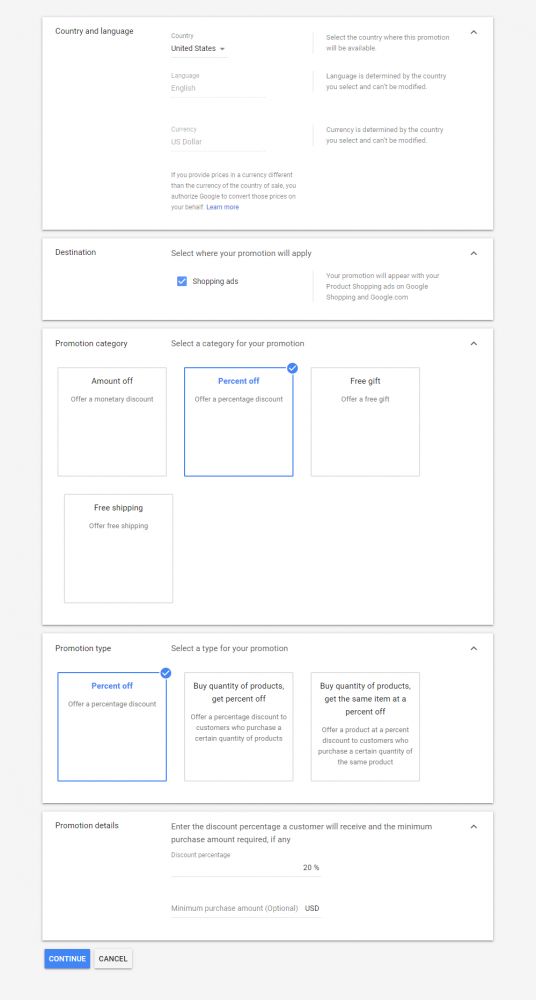
after clicking on “Continue” the next screen you get is this:
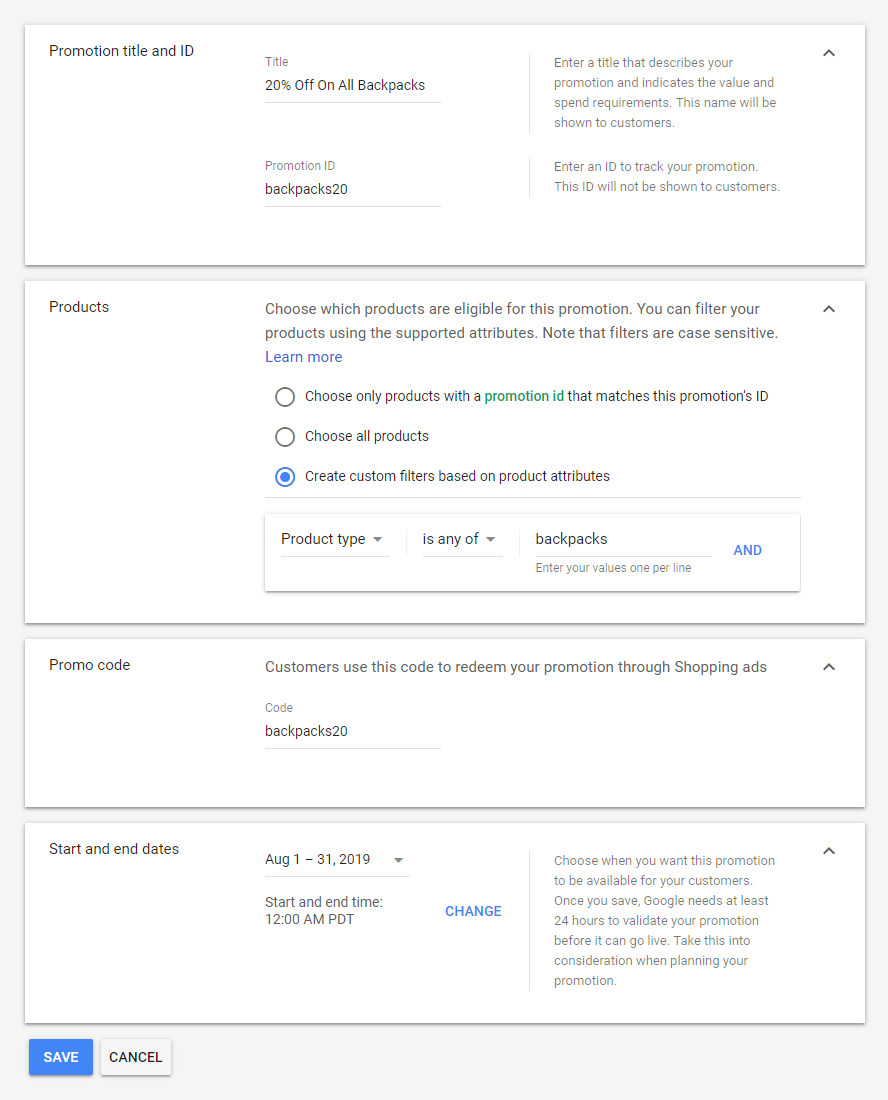
As you can see, we defined which products will be promoted with product_type. Depending on your specific requirements, you can use item_id, brand or item_group_id as well.
And there you have it. A short guide on how to set everything up from Magento 2 and Google Merchant Center side. I hope it encourages some of you to try to create one on your own.
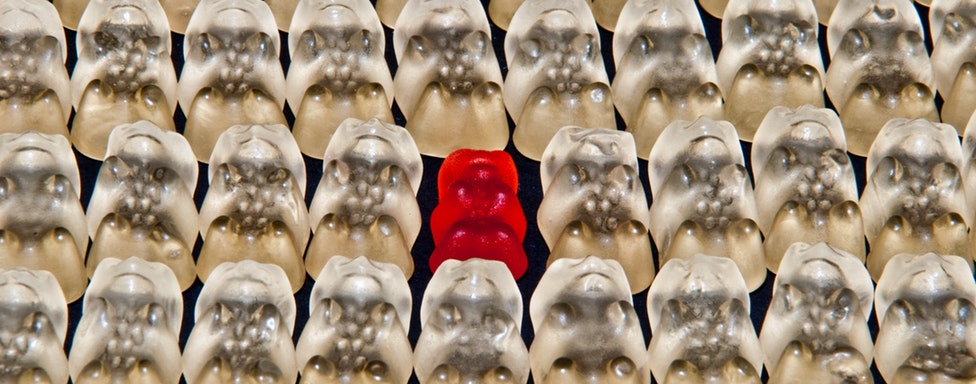
Obstacles in the way…
It looks too easy to be true, right?
Have you ever started to create a promotion only to realize that your Magento setup (or some other platform) has its limitations and that your products aren’t that well organized for this promotion’s purpose?
Well, we’ve done lots of different promotions for our clients that have different store setups. And to tell you the truth, some of the final solutions were quite creative. Almost each and every promotion that we’ve set up for our clients needed some improvisation from our side.
Let me walk you through one situation that we had exactly with this – the most simple and easiest promotion type. It can’t be that difficult to set 20% off on a specific category, right?
Here is a description of the problem and how we solved it. I hope you’ll get inspired to try something similar on your own. If you need assistance, reach out and let us see how we can help.
Problem:
Recently, we decided to change the setup of our shopping campaigns in a way that we created one specific shopping campaign that carries only bestsellers.
To get all the bestselling products in that specific campaign, we’ve set the Bestsellers category as the most important one (the highest priority), putting all the products there first. That means that if we go with the setup that I just described in the first part of this blog post, the items from our backpacks category that are bestsellers won’t fit the original backpacks category and won’t be included in the promotion which isn’t something we wanted.
So what could we do?
We had to rethink the whole promotion set-up strategy. We decided not to go with the separate, promotion feed as we already had most of the data we needed in our original, product feed. So we decided to update the current data for Merchant Center by using Merchant Center’s feed rules.
The strategy I’ll describe below isn’t something revolutionary, but its goal is to show you that the unexpected obstacles can be resolved with the powerful tools that Merchant Center holds. You just have to see what attributes you have at your disposal and plan how to use them to reach your goal.
So, due to our current shopping product groups set up, we had to maintain the Bestsellers category as the top priority one, which prevented us to define promotion products by the product_type. To get all the backpacks we need in one place (bestsellers or not), we analyzed our current Magento setup and decided to use item type attribute.
By using feed rules, we were able to set the promotion_id on all the backpacks that our site carries, regardless of the category, which made the rest of the job pretty easy.
Here is how we did this.
First, we went to our product feed in Magento and mapped item_type to custom label 2. After the feed was generated again and fetched in the Merchant center, we created a new rule in the following way.
We navigated to Products > Feeds and chose our feed from the list. Next, we clicked on “Feed rules” and clicked “Create rule”.
Create rule > choose “Processed attributes” from the drop-down menu and select “promotion id” from the next dropdown. This will lead you to this page:
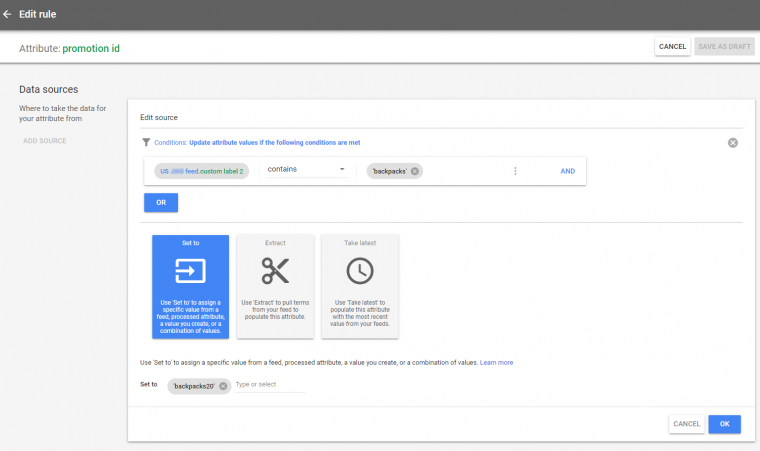
Here we just chosen our Primary feed, added “contains” directive from the dropdown and added “backpacks”. Next, we clicked on “Set to” and added promotion id (backpacks20). Hit OK and that’s it. Now we just have to go back to the Promotions tab and add the new promotion with the Promotion tool. Here are the steps:
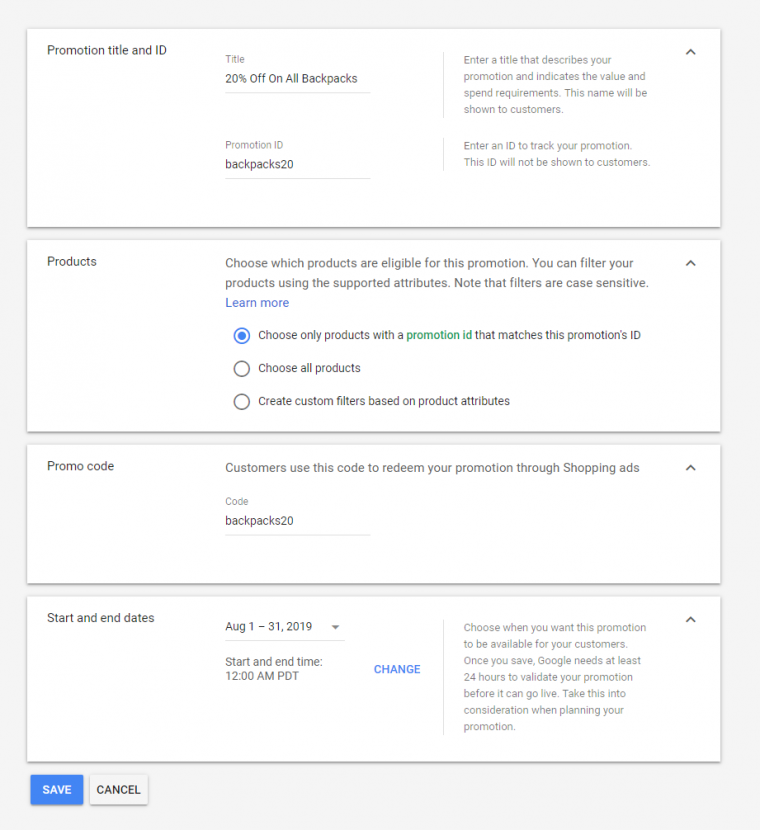
The first step is identical to the one we already described in the first example:
Here is a screenshot of the second step:
And that is it! You just have to wait until your promotion gets approved which usually takes less than 24 hours.
I really hope that this article will help some of you in setting up your first Merchant promotion. Or maybe the solution that we described in the second part of this article will inspire others to do something similar and to successfully overcome the obstacles that appear on their way.
What situations are the most common ones during your promotion setup? Or do you have some specific ones each and every time? If you need our help in getting creative while solving the puzzle, don’t hesitate to contact us.
Anyhow, stay tuned as we’ll cover some more specific cases and our solutions in future blog posts.