To continue contributing to the series of blog posts about Sylius theme development, I would like to dig deeper in creating and modifying the custom theme. I’ll write about the scenario where the client wants to implement a custom design and use their own theme for the frontend experience. There are also a few things to explain in term of Sylius theming, customizing template, and creating and using new custom theme, so I’ll cover that too.
Just to mention, when I was writing this blog posts, I have used Sylius 1.2 version as my local project. A few days ago, Syilus got to 1.3 version, so some of my comments about code will be different for each version of Sylius. I’ll try to keep up and take examples for both versions, but the purpose of this posts is to get started with Sylius theming. BTW, I highly recommended for your new project to go with a latest Sylius version.
Templates Overriding
If you were wondering, customising theme is nothing more than a template overriding.
When you need to make a small modification, for example, to add some custom code or change block order, different color etc., then you don’t need to create a new theme. Just go with the simple template overriding. There is also an option for templates customisation via events, but for now, I’ll skip this method.
If you are familiar with Symfony, then you’ll notice that this approach is same as in any Symfony project. If you look inside the documentation, there’s an example for modifying default login template. The idea is to copy the whole .html.twig template edit and customise it. So first things first, the main problem will be to locate template, especially when you add some new plugins, then it will even harder to locate each template. But for start, we’ll be focused on main shop’s “views”.
So if we are looking for templates, first we’ll look inside the SyliusShopFolderRoot/src/Sylius/Bundle/ShopBundle/Resources/views/ now here is all that you need for start.
Also, one more folder to keep an eye to, SyliusShopFolderRoot/src/Sylius/Bundle/UiBundle/Resources/views/ . Here you’ll find templates for messages, breadcrumbs, buttons, layout etc. If you’ll start using your own theme, then this is place to look. 🙂
So back to template overriding.
By following the documentation, we see that we need to change Login page template inside ShopBundle folder. There is login.html.twig. Copy this file to:
Sylius 1.2
app/Resources/SyliusShopBundle/views/login.html.twigSylius 1.3
templates/bundles/SyliusShopBundle/login.html.twigYou can see the difference between 1.2 and 1.3 version. They changed location. In the new version, they moved from app/* folder to root folder templates/bundle.
Make changes, save the template, and finally, clear cache!
$ php bin/console cache:clearThere you go.
Create custom theme
Now, we’ll create a new Sylius theme. There are a few things that you need to do before you even start with the modification. 🙂
For Sylius ver. 1.2
Open app/config/config.yml, and at the end of the file add:
sylius_theme:
    sources:
        filesystem: ~
Inside app/themes/ (if you don’t have folder theme, create it), create a folder with a name of theme, in our case it can be stamba-theme. 🙂
Next thing is to create a composer.json file. Now here you need to add some basic info about the theme.
{
    "name": "inchoo/stamba-theme",
    "authors": [
        {
            "name": "Stanislav Mihic",
            "email": "[email protected]"
        }
    ],
    "extra": {
        "sylius-theme": {
            "title": "Stamba Theme"
        }
    }
}
Please note, first line “name” needs to have a vendor name before theme name, in my case inchoo.
Next thing is to install theme assets. Inside terminal/console run
bin/console sylius:theme:assets:installNow, let’s quickly explain what this command does. To put it simply, it will create symlink for all static files used in plugin/bundle. Not for entire directory, only files. For example I will use BitBag SyliusMailChimpPlugin . After you have installed the plugin, look inside vendor/bitbag/mailchimp-plugin/src/Resources/public . There is a bitbag-mailchimp-plugin-newsletter.js . Run command theme:assets:install, and you’ll have symlinked .js file inside web/bundles/bitbagsyliusmailchimpplugin/bitbag-mailchimp-plugin-newsletter.js.
For Sylius ver.1.3
Open/Create file config/packages/sylius_theme.yaml, add:
sylius_theme:
    sources:
        filesystem:
            directories:
                 - "%kernel.project_dir%/themes"
Now the tricky part 🙂 , location of theme folder. Inside root folder of Sylius installation, create “theme” folder, and put all custom edited files there.
P.S. Please look on this github thread, https://github.com/Sylius/Sylius/issues/9807.
Ok, create a theme folder inside “themes/” directory, and then inside it create composer.js file
{
    "name": "inchoo/stamba-theme",
    "authors": [
        {
            "name": "Stanislav Mihic",
            "email": "[email protected]"
        }
    ],
    "extra": {
        "sylius-theme": {
            "title": "Stamba Theme"
        }
    }
}
Run
bin/console sylius:theme:assets:installSame thing, but now the location is changed. Instead in web/bundles/ static files, it will be placed inside public/bundles/.
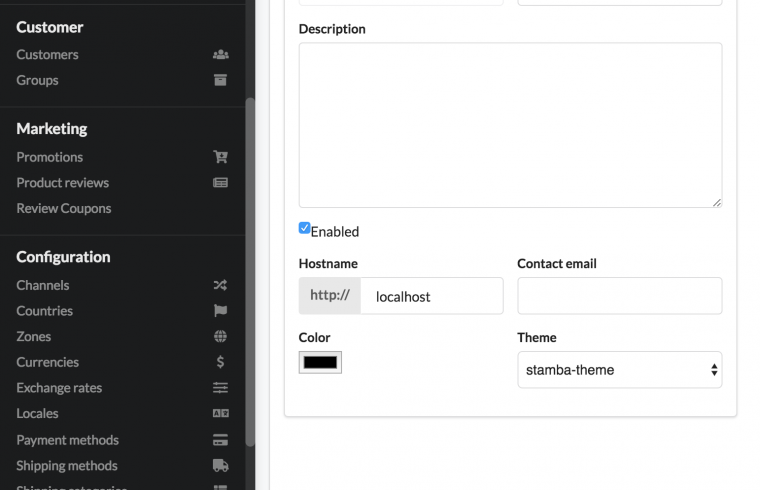
Now, before you start to edit the theme, please log in to admin and enable a new theme. On admin’s side, got to Configuration/Channels, edit channel, and select inside the dropdown a new custom theme.
And if something isn’t working, please run $ php bin/console cache:clear first.
Good luck with your Sylius projects!