
Hi everyone, in my first-ever article, I’ll show you how to setup your custom theme workflow in the latest Sylius release (1.3.0), powered with webpack and with latest Symfony 4 standards. If you haven’t read Stanislav’s articles about Sylius frontend overview and setting up a custom theme, go check it out so you can understand this part completely. 🙂
Starting with Symfony 4, web folder isnt public anymore. Only public folder is a public folder. Because of that, Symfony 4 best practices offers you Webpack Encore to use for managing assets.
Webpack Encore is a simpler way to integrate Webpack into your application. It wraps Webpack, giving you a clean & powerful API for bundling JavaScript modules, pre-processing CSS & JS, and compiling and minifying assets.
Personally, I think that Webpack Encore is cool and you get a lot out of out-of-the-box features to use. But if you want to know how things work under the hood, or you want to control your build process, then you need to make your own webpack workflow for managing assets.
For a purpose of this article, my custom theme is called inchoo-rwd.
Inside inchoo-rwd theme, create frontend folder. Inside frontend, create webpack.config.js, and package.json files.
If you don’t want to waste time configuring webpack, you can copy my setup configuration. 🙂
Webpack configuration
package.json
{
  "name": "Brca sylius config",
  "version": "1.0.0",
  "description": "sylius nanananananana",
  "main": "app.js",
  "scripts": {
    "build": "webpack --mode development",
    "dist": "webpack --mode production",
    "watch": "webpack --watch --mode development"
  },
  "author": "Brca (%lukaomi)",
  "license": "ISC",
  "devDependencies": {
    "babel-core": "6.26.3",
    "babel-loader": "7.1.4",
    "babel-preset-env": "1.7.0",
    "browser-sync-webpack-plugin": "2.2.2",
    "copy-webpack-plugin": "4.5.4",
    "css-loader": "0.28.11",
    "mini-css-extract-plugin": "0.4.0",
    "node-sass": "4.9.0",
    "optimize-css-assets-webpack-plugin": "4.0.2",
    "sass-loader": "7.0.1",
    "uglifyjs-webpack-plugin": "1.2.5",
    "webpack": "4.10.2",
    "webpack-cli": "2.1.4",
    "webpack-dev-server": "3.1.4"
  },
  "dependencies": {
    "browser-sync": "2.24.4",
    "imagemin-webpack-plugin": "2.3.0"
  }
}
webpack.config.js
const path = require('path');
const UglifyJSPlugin = require('uglifyjs-webpack-plugin');
const MiniCssExtractPlugin = require("mini-css-extract-plugin");
const OptimizeCSSAssetsPlugin = require("optimize-css-assets-webpack-plugin");
const BrowserSyncPlugin = require('browser-sync-webpack-plugin');
const CopyWebpackPlugin = require('copy-webpack-plugin');
const ImageminPlugin = require('imagemin-webpack-plugin').default;

module.exports = {

  entry: ['./src/js/app.js', './src/sass/style.scss'],
  output: {
    filename: './../../../public/assets/shop/js/themes/inchoo-rwd/js/app-custom.js',
    path: path.resolve(__dirname)
  },
  module: {
    rules: [
      // perform js babelization on all .js files
      {
        test: /.js$/,
        exclude: /node_modules/,
        use: {
          loader: "babel-loader",
        }
      },
      // compile all .scss files to plain old css
      {
        test: /.(sass|scss)$/,
        use: [MiniCssExtractPlugin.loader, 'css-loader', 'sass-loader']
      }
    ]
  },
  plugins: [

    // Enable copy img theme files
    new CopyWebpackPlugin(
      [
        {
          from: './src/images/',
          to: './../../../public/assets/shop/images/themes/inchoo-rwd/images/',
        },
      ]),

    // Enable img optimization
    new ImageminPlugin ({
      test: /.(jpe?g|png|gif|svg)$/i,
      pngquant: {
        quality: '95-100'
      }
    }),

    // extract css into dedicated file
    new MiniCssExtractPlugin({
      filename: './../../../public/assets/shop/css/themes/inchoo-rwd/css/style.css',
    }),

    // Watch for changes
    new BrowserSyncPlugin({
      host: 'localhost',
      port: '8080',
      // If using local domain for project change this.
      proxy: 'http://sylius.loc', // ---> change this url for yours
      open: false,
      files: [{
        match: ['./../**/**/*.html.twig'],
        fn: function (event, file) {
          if (event === "change") {
            const bs = require('browser-sync').get('bs-webpack-plugin');
            bs.reload();
          }
        }
      },
        {
          match: ['./src/js/app.js', './src/sass/style.scss'],
          fn: function (event, file) {
            if (event === "change") {
              const bs = require('browser-sync').get('bs-webpack-plugin');
              bs.stream();
            }
          }
        }],
      injectChanges: true,
      notify: true
    })
  ],

  optimization: {
    minimizer: [
      // enable the js minification plugin
      new UglifyJSPlugin({
        cache: true,
        parallel: true
      }),
      // enable the css minification plugin
      new OptimizeCSSAssetsPlugin({})
    ]
  }
};
I wouldn’t go into details line by line what’s inside this configuration files, but generaly in this example, features that you can use are:
- Babel polyfill for writing ES6 javascript
- SASS, CSS and JS optimization
- Browsersync
- Image optimizations
If you like, you can configure it to use PostCSS or do other crazy webpack stuff. 🙂
Setting up workflow
Next, go inside terminal directory sylius-project/themes/inchoo-rwd/frontend, and hit:
npm installAfter you install following dependencies, inside frontend folder create src and put files and folders like in the picture bellow.
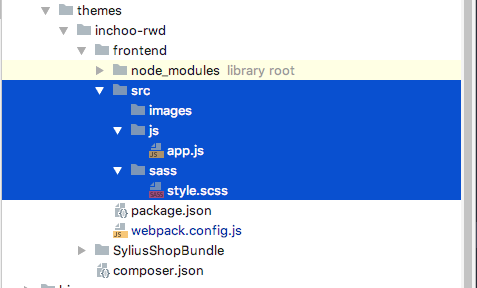
Inside app.js and style.scss, add a folowing code:
app.js
import './../sass/style.scss';
class app {
helloWorld() {
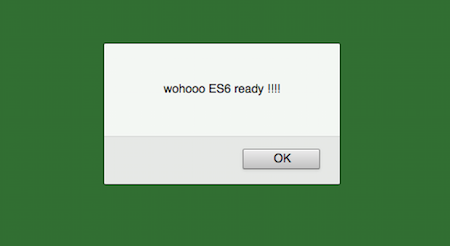
alert('wohooo ES6 ready !!!!');
}
}
const a = new app();
a.helloWorld();Because we use css-loader to have css-in-js feature, we need to import main sass file inside app.js to be rendered. In this workflow, app.js represents our main file where you include all your components and vendors.
styles.scss
$primary: #56db59;

body {
    background: $primary;
    font-size: 24px;
}
Great! Now you configured your basic workflow powered with webpack.
Go inside your theme SyliusShopBundle/views/layout.twig.html and add folowing code:
At line 21, replace
{% include '@SyliusUi/_stylesheets.html.twig' with {'path': 'assets/shop/css/style.css'} %}with
{% include '@SyliusUi/_stylesheets.html.twig' with {'path': 'assets/shop/css/themes/inchoo-rwd/css/style.css'} %}And at line 76
{% include '@SyliusUi/_javascripts.html.twig' with {'path': 'assets/shop/js/app.js'} %}add below
{% include '@SyliusUi/_javascripts.html.twig' with {'path': 'assets/shop/js/themes/inchoo-rwd/js/app-custom.js'} %}If you got lost, you can download files from github repo. 🙂
To be upgrade-proof, my advice is not to remove Sylius vendor app.js (Sylius render core logic through it), while trying to grab parts from Sylius vendor js, and join it up with your custom js logic into one single js file. When updates come, and if something changes, you will need to check changelogs to fix what went wrong. 🙂
In current frontend workflow, you have three options for webpack build process (you can look inside package.json)
- Development – in console: npm run build
- Development+watch – in console: npm run watch
- Production – in console: npm run production
In the same terminal directory, hit following command:
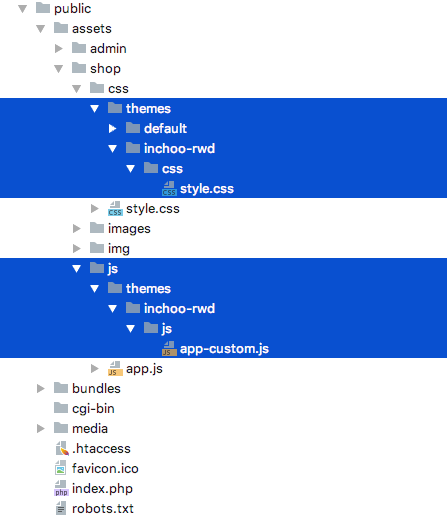
npm run buildThat command will run folowing script to start webpack build task process. If you complete all previous steps, you should see new files and folders inside public folder.
Refresh the browser. You should see the changes.
Woohoo! 🙂 you made it to the end. Here is a last final tip for ya 🙂
Because of Sylius’ core, app.js that we use in layout.twig.html we can use libaries that Sylius use like:
- jquery”: “^3.2.0”
- lightbox2″: “^2.9.0”
- semantic-ui-css”: “^2.2.0”
and others…
So you dont need to include them again if you need them.
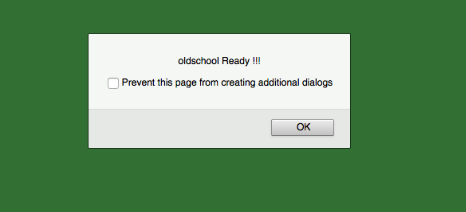
To test it out inside our theme app.js file, insert the following code:
$(document).ready(function(){
  alert('oldschool Ready !!!');
});
In the same terminal directory, hit following command:
npm run buildRefresh the browser.
And that’s it! 🙂
Conclusion
Hope I helped you to quickly and easily understand the process of creating custom theme workflow on Sylius 1.3.0 version based on Symfony 4 best practices. I want to emphasize that currently, there isn’t a standard way for creating custom theme, and this is my interpretation of doing it, based on my previous experience working with Sylius. My advice to you guys is to regularly check changelogs to see what is going on with current development, so you can be up to date with it for future updates! 🙂