Getting started with building Admin module in Magento

Getting started with building Admin module in Magento

Due to the “complexity” of Magento’s xml files, developers can waste great amount of time on “unnecessary” things.
When I say “complexity” I say it with purpose. XML files are not so complex by them selves, but due to extreme lack of documentation and changes Magento pumps in every new “major” release, people are lost among things that should really be sideways. Anyway, in this little article I will show you how to create basic, startup structure for your module to get it shown under Magento Admin main top menu.

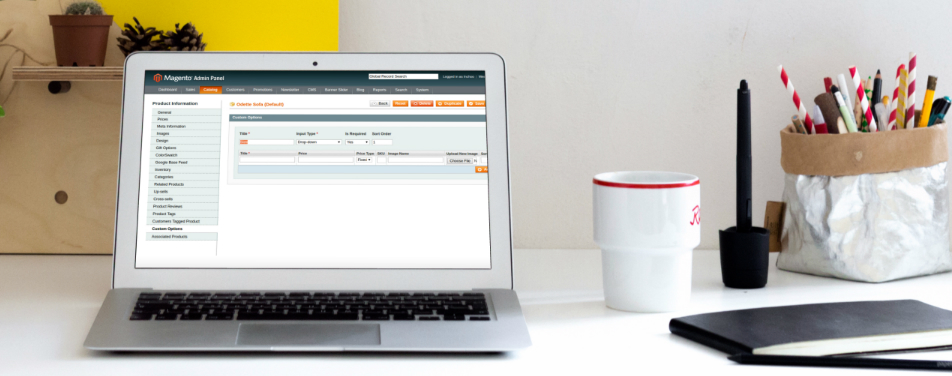
As you can see on the picture below, I am creating a menu item with title “ActiveCodeline_SampleModule1”.

m1

My module is called “SampleModule1” and it consists of just a few files. As you go over the provided config.xml file you will see that I used “BigLettersSmallLetters” style. I do this intentionally because this “naming convention” is another great pitfall for developers when it comes to constructing xml files. I know I too still struggle with “what must be the lowercase” question.

Here is my example of config.xml file

< ?xml version="1.0"?>
 
<config>
    <modules>
        <activecodeline_samplemodule1>
            <version>0.1.0</version>
        </activecodeline_samplemodule1>
    </modules>
 
 
<global>
        <helpers>
            <samplemodule1>
                <class>ActiveCodeline_SampleModule1_Helper</class>
            </samplemodule1>  
        </helpers>
</global>        
 
 
        <admin>
        <routers>
            <samplemodule1>
                <use>admin</use>
                <args>
                    <module>ActiveCodeline_SampleModule1</module>
                    <frontname>samplemodule1</frontname>
                </args>
            </samplemodule1>
        </routers>
    </admin>


    <adminhtml>
        <menu>
            <menu1 translate="title" module="SampleModule1">
                <title>ActiveCodeline SampleModule1</title>
                <sort_order>60</sort_order>
                <children>
                    <menuitem1 module="SampleModule1">
                        <title>Menu item 1</title>
                        <action>samplemodule1/example</action>
                    </menuitem1>
                </children>                
            </menu1>
        </menu>
        <acl>
            <resources>
                <admin>
                    <children>
                        <menu1 translate="title" module="SampleModule1">
							<title>ActiveCodeline SampleModule1</title>
                			<sort_order>60</sort_order>
                            <children>
                                <menuitem1>
                                    <title>Menu item 1</title>
                                </menuitem1>
                            </children>
                       </menu1>
                   </children>
               </admin>
           </resources>
        </acl>
    </adminhtml>    
 
</config>

My “admin” controller is extremely simple, just an indexAction() method. However it does tell a lot. Below is a code of indexAction() method.

...
public function indexAction()
{
	// "Fetch" display
    $this->loadLayout();
 
    // "Inject" into display
    // THe below example will not actualy show anything since the core/template is empty
    $this->_addContent($this->getLayout()->createBlock('core/template'));
 
    // echo "Hello developer...";
 
    // "Output" display
    $this->renderLayout();
}
...

And below are all the files required for this “Admin example module” to work.

Download Admin example module aka SampleModule1

Note this is only example, DO NOT USE on live site.

Cheers…

You made it all the way down here so you must have enjoyed this post! You may also like:

How To Connect Google Analytics 4 To Magento 2 Bojan Mareljic
Bojan Mareljic, | 35

How To Connect Google Analytics 4 To Magento 2

3 best open-source eCommerce platforms in 2021 Zrinka Antolovic
Zrinka Antolovic, | 7

3 best open-source eCommerce platforms in 2021

eCommerce Returns Management – a simple solution from the Fashion industry Zrinka Antolovic
Zrinka Antolovic, | 12

eCommerce Returns Management – a simple solution from the Fashion industry

44 comments

  1. Hello!
    If you haven’t made a Magento Custom Module Development decision yet, I suggest that you familiarize yourself with review like this dinarys.com/blog/custom-module-development
    Enjoy reading!

  2. Really simple and really excellent. Thanks. i wish others teach like you.
    but i wish u defined the template too. because i confused in searching …

  3. tell me, where THE F*CK, is this

    // THe below example will not actualy show anything since the core/template is empty
    $this->_addContent($this->getLayout()->createBlock(‘core/template’));

    where can i write my code, i fucking hate magento, i do not find any core/template folders.
    what do i have to write in createBlock as a parameter?
    where, WHERE WHREEEEEEEEEEEEE?

  4. Well, a twice gzipped tar archive – I guess that happened by accident.

    So to uncompress it run gunzip once, than add again the extension .gz and rerun gunzip or directly tar with xzvf parameters.

    Thanks for the skeleton module 🙂

  5. That archive is broken, after I uncompressed it with gzip this file is not a tar nor a zip nor anything… just broken.

    Well so many people having trouble with that file. I’m wondering about jbatson suggestion. What that file should be a gzipped, tarred and zipped archive?

    Man thats crazy, why not providing a zip or gzipped tar in first place, guess just to annoy people… :/

  6. For them who are getting 404Error, change as follows:

    whatever

    with :

    whatever

    // Notice the capitalization of “N”…

  7. If you work on on this example here you have to define in confix.xml your layout

    samplemodule1.xml

    Afterwards you should create this layout file and add the stuff you need.

    Furthermore you need your own block class and the template file.

  8. Can anyone provide a sample code that will show the text “Hello developer” in middle content area instead of “upper left corner”.

  9. Hi, I know this post is old, but I have a question and I am not able to find a solution for that. I used your code above and it works fine for me. The only thing is: How can I make the page render correctly? If I uncomment the

    echo Hello developer

    line this apperas in the upper left corner. It is really important to me to get this working. Thanks in advance

  10. hi,

    i installed a fresh copy of magento 1.4.1.1., downloaded your package, unpacked it and copied the “app”-folder into the magento-folder, everything looks fine in the app/code/local/ActiveCodeline- and etc/modules-directories, but the new navigation entry doesn’t show up in the admin-panel on WinXP/XAMPP machine.

  11. Hi great tutorial!
    But, how can I add the layout into this example?
    I tried put the layout’s tag inside the tag adminhtml, and create the xml file in app/design/adminhtml/*/*/layout/, but it doesn’t work.
    Do you know how to solve this problem?
    Thanks and sorry my english…

  12. Finally it worked. It was different problem – I didn’t know I have to add Session Helper’s form key to successfully POST. So it wasn’t controller thingie, just form. It works. However I’ve done it quite different way after all, but I cannot find the source someone on magento forum posted it.
    I added controller section into tag – because of this my controller worked with /admin/ before controller name in url.

  13. Hi, i have created a module in admin section and setup link in admin top menu, while i clicks on it i go to my controller and get the header and footer part of the admin section but not getting the middle part.
    I put my XML file for layout in adminhtml/…./layout directory and phtml file also at adminhtml/…./template. but getting the blank page implace of my layout page, is any body have any document or any thing that can help me
    Thank you

  14. @shylaja Please use the winRar if on windows or unarchiver if on mac. I’ve downloaded and extracted the file without a problem on both machines. What might be the problem is that your software doesn’t decompress the file completely since this is a tar.gz compression.

  15. Great Tutorial Mate!
    But can you please describe little bit more if we want to add a big module in Administration!
    Actually i am builidng this http://www.getmybrand.com website and need to add new module within its front end and back end!
    Any help would be appreciated!

    Regards,
    Raj

  16. To upack the file:

    download the tar.gz file and extract

    the next file is a tar file but the the period is not between the filename and the tar, should be samplemodule1.tar

    extract that

    the next file should be a zip file, need to add the .zip extension

    opened right up…

    hope this helps…

  17. The sample file is a mystery to me. I have all the tools: zip,gz,tar etc.

    Can somebody jot down the steps to unpack this please?

  18. I am also a little confused, where do I add in my page stuff, the menu item shows up and takes me to a page but it has no content what files do I need to add?

  19. But when I echo something, it doesnt show up where it is supposed to show up.. instead, it shows up before the tag..

  20. @Lex: At the end of Asia-Connect’s article stands: By Branko Ajzele from Inchoo.net, hope that answers your question.

  21. Aye? who stole whos article? someone has copied and pasted asia-connect.com.vn/2009/10/getting-started-with-building-admin-module-in-magento/

  22. Choice big help. You’re right about the complexity of the xml files, I’m finding it extremely hard to pin point some clear documentation on developing for Magento.

  23. Nice skeleton template, thanks Branko.

    I hope you’re going to play around in the admin some more :). It would be great to know how to create custom updateable attributes on the View Order page (like the Gift message update).

Leave a Reply

Your email address will not be published. Required fields are marked *

You may use these HTML tags and attributes: <a href="" title=""> <blockquote cite=""> <code> <del datetime=""> <em> <s> <strike> <strong>. You may use following syntax for source code: <pre><code>$current = "Inchoo";</code></pre>.

Tell us about your project

Drop us a line. We'd love to know more about your project.